Friday, November 14, 2014

A funny thing happened on the way to Texas

After a series of botched airline tickets and funny taxi rides we are finally in our new Texas home!!!  Germany gave us an amazing four years, but it's good to be back in the United States so that we can be nearer to our families.

image

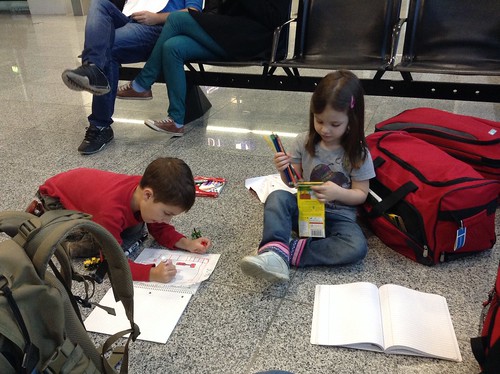
Our actual flight was pretty uneventful, but catching the flight was an interesting series of events that involved our original tickets having the wrong date printed on them which left us scrambling to get a new flight from a different airport the next day.

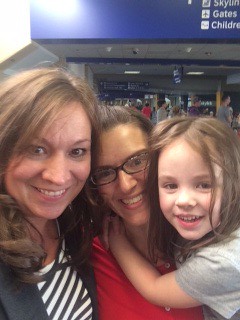
This is where the funny part comes in!!!  Because we had to change our flight, we ended up landing in Dallas for our layover to San Angelo.  My daughter needed a bathroom break and while we were standing in line at one of the many bathrooms at the Dallas airport I told the woman in front of me that I really liked her dress and it was just like one that another blogger I follow made.  She asked about my latest post too and we realized we both follow each others blogs, and I was actually talking with the maker of the dress. Not only that, but we've been emailing back and forth the whole week about my 1248 triangle quilt!

image

It was crazy good to meet Tracey from the finding joy in the little things blog at the Dallas airport while we were both on the way to different places.  How insane is that!!!

It was great meeting you Tracey and I hope that you enjoyed your California trip.

Thursday, October 30, 2014

1248 Triangle Top update

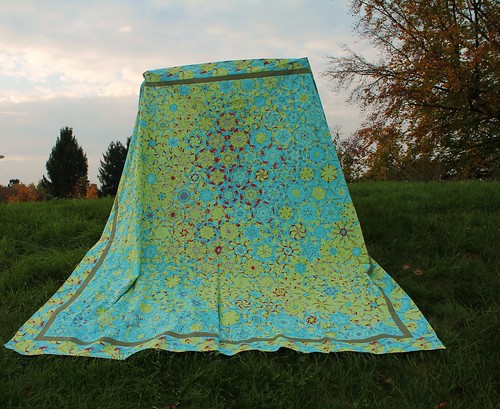
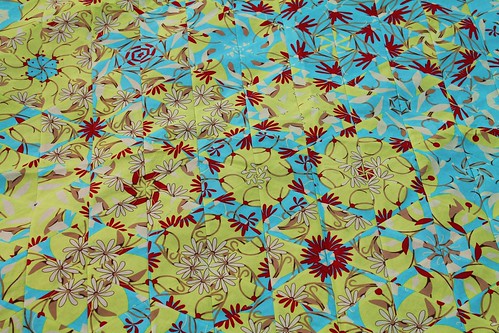
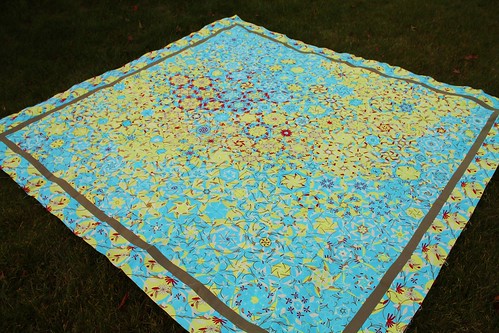
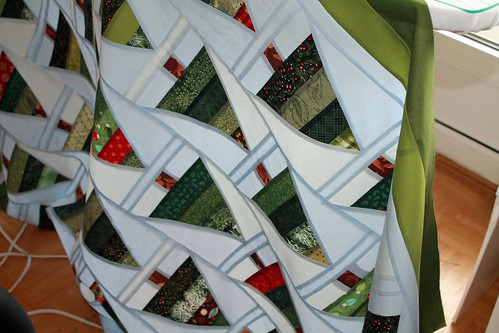
I've been wanting to post these updated photos of my 1248 triangle quilt all week, but it's been hard to get any good pictures while we are in the process of moving.  This queen sized quilt is all done and ready to be quilted as a Christmas gift for my sister and her husband!  It doesn't hurt that this year late November is their 2nd wedding anniversary, which is the cotton anniversary!

IMG_7812

I don't think that these photos really do the colors on this quilt justice (I hope to get some better one's post quilting), but I do hope that they show the cool design.

IMG_7804

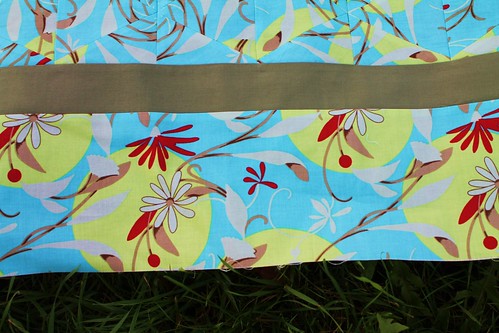
I love how the skinny solid border stripe separates the one block wonder blocks from the original fabric.  It really shows how the technique can change the pattern.  

IMG_7815

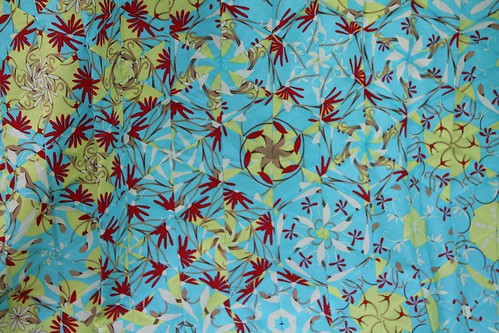
I really can't pick any favorite hexagons because I like too many of them!  Although, I do like the ones that form swirls and stars a lot.

IMG_7807

I think that I might have to make another one of these now because this one was so fun to do!

IMG_7830

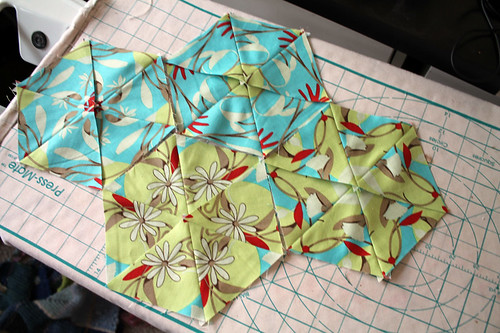
I also love how easy the pattern came together.  The book talked about laying the hexagons up on a design wall and tweaking them over the course of a few days or weeks to get a pleasing pattern, but really, I don't have that kind of time.  I took a much more serendipitous approach to the design process and laid them out on the floor and took an hour to re-arrange while the kids were in bed.  It came together pretty fast compared to how hard I thought it would be, and I love how it flows.  

I can't wait to get this quilted.  One more item checked off my Christmas to do list!!!  

Tuesday, October 21, 2014

Halloween 2014

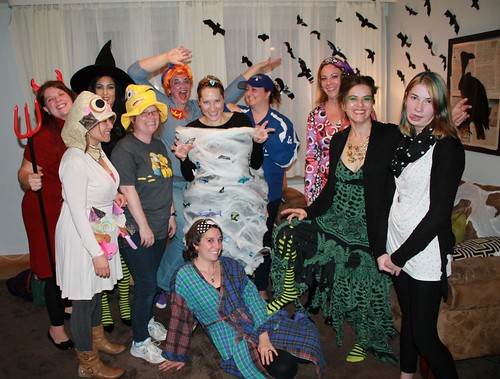
It's my favorite time of year again!  The leaves are turning, the air is crisp, and the scarves are getting aired out.  It's also time for our annual Bunco Halloween Party.

IMG_7736

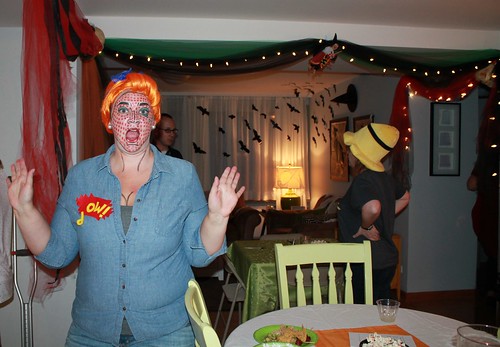
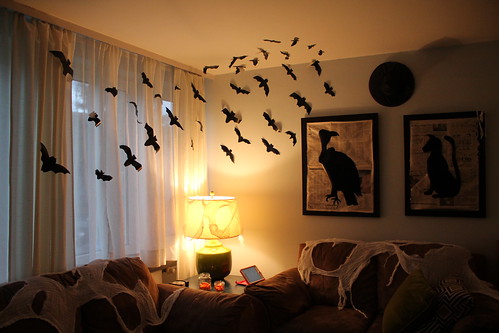
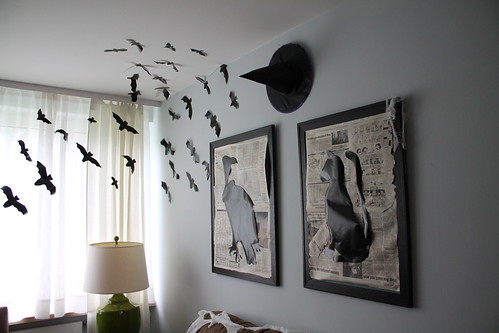
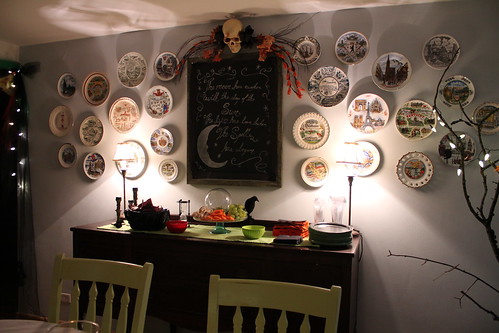
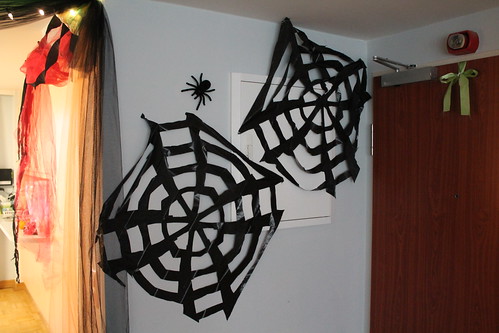
I have had the pleasure of hosting two years in a row now, and I love decorating the house so it's nice and spooky for our guests.  If you missed last years decorations you can see them here.  This year, I went for spooky chic with lots of spider webs, spooky art, flying bats, twinkly lights, and Halloween colored tulle swags separating the rooms.

IMG_7720

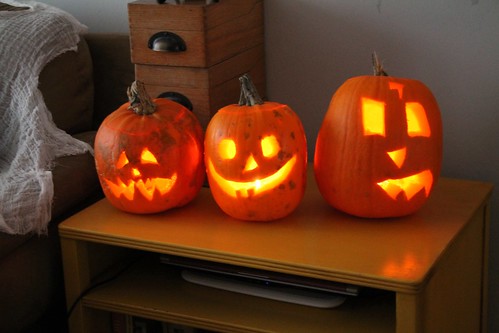
I learned from last year that lighting is super important when throwing a Bunco Halloween party.  Last year, the overhead lights were on, and it distracted from the spooky decor.  This year, I turned off the overhead lighting and only used fake candles, jack-o-lanterns, and lamps.  The effect was much better and it made a huge difference.

IMG_7752

This year's art was super easy too.  I covered my normal prints with tea stained newspaper and then cut out a spooky vulture (courtesy of the Graphics Fairy) and cat silhouette for each frame out of black wrapping paper.  I then used the left over paper to cut out some bats for the drapes and wall.  I think my favorite part of the living room decor was the witches hat above the paintings.  Next year I think it might be cool to do a whole wall of different witches hats.  What do you think?

IMG_7715

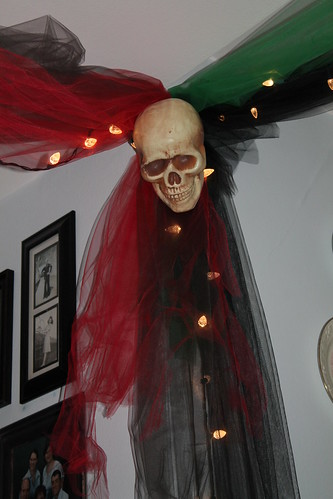
I also loved the dining area decorations. I left my travel plates up, but I covered the art with black poster board and topped it with a skull swag.  

IMG_7716

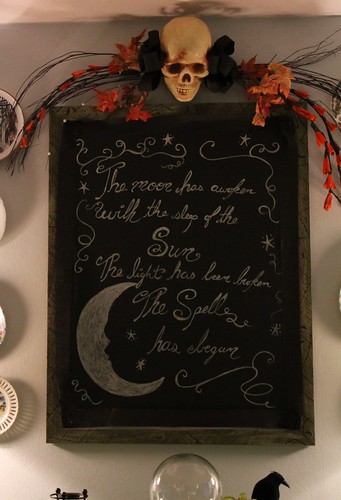
I used up two silver metallic sharpie pens to make this print.  I don't claim to have the greatest penmanship, but I love this Halloween poem and wanted to include it in the decor.

The Moon has awoken
With the sleep of the Sun
The light has been broken
The spell has begun

I don't know who wrote it, but if anyone else does let me know so that I can give them proper credit.

IMG_7711

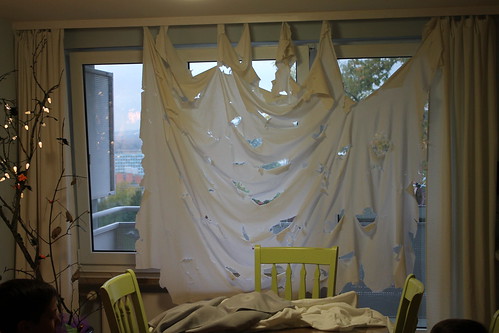
Some of the other decorations that we had up are bare branches covered in bats and twinkling lights and a ripped and torn window covering.

 IMG_7758

tulle swags with skull corners

IMG_7706

trash bag spider webs

IMG_7703

and jack-o-lanterns made by the little helpers :)

IMG_7747

We had a great night of Bunco.  I hope this post helps you to haunt your house or party too! 

Happy Halloween!

Sunday, October 12, 2014

Christmas Tree Lane Quilt

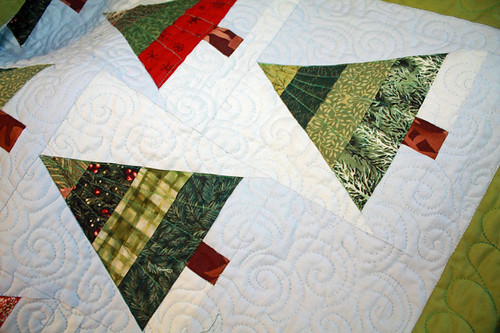
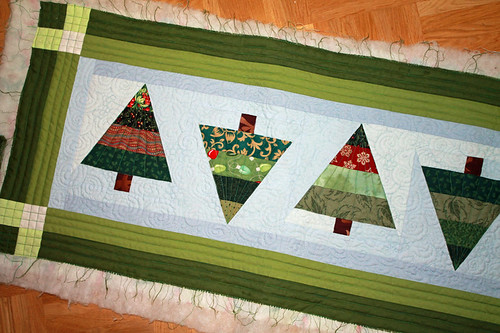
I'm so happy to report that my Christmas Tree Lane quilt and table runner are almost complete!  In my previous posting, I had just finished the piecing while dealing with our upcoming move back to Texas.  The movers come this week and I'm just about to lose my sewing machine and fabric for the next few months :(

IMG_7686

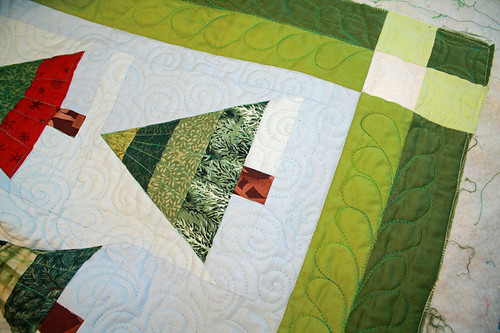
I've finished the quilting on both the quilt and the table runner despite not being able to find my supreme slider for some weird reason and running out of the variegated green thread that I was using to quilt the trees and borders.

IMG_7688

I love the swirl quilting on these pieces and even tried my hand at incorporating a few pebbles into the swirls for the table runner.  I really think that my free motion quilting has improved over this last year and I was excited to do some feathers on my quilt border (although, I choose to do line quilting for the table runner border).

IMG_7683

A few of my feathers went a bit wonky, but overall I'm pretty happy with their size and shape.  Now, it's onto the binding.  I'm torn between a fun holiday stripe and a great red plaid.  Decisions, decisions :) 


Monday, October 6, 2014

1248 Triangles

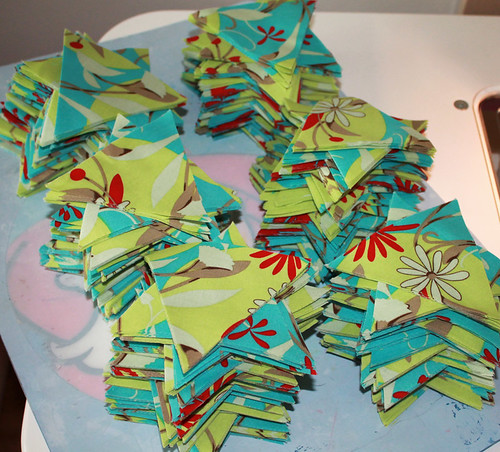
Once upon a time, I saw a one block wonder (or stack-and-whack, if you prefer) quilt at a show, and ever since then I've really wanted to make one.  Call me crazy, but with all the other things going on in my life right now (school, moving to a new home in three weeks, Halloween, and the family) I decided to try to whip out one of these quilts before we leave Germany so that it will be done in time for Christmas as a gift for my sister and her husband.

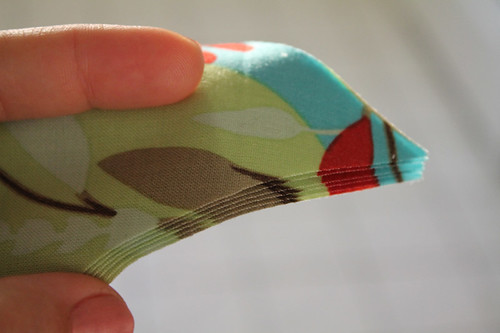
Yep, I'm nuts.  There are 1248 triangles in this pile.  These stacks of hexagons represents 8 yards of fabric!

IMG_7447

Thankfully the whacking only took one night.  If you've ever read about these quilts, lining up the fabric is really the hardest part.  It took me forever to get my layers all perfectly straight, but it makes a huge difference in how the blocks look when they are put together. 

IMG_7457

I'm now at the fun part.  I get to arrange all my hexagons together in order to create the design.  The books say to put it up on a wall and tweak it over the course of a few days, but I don't have that kind of time.  I'm going to be arranging these on the floor tonight while the kids are asleep and whatever design is formed is how it's going to get sewn together.  That's just how we busy moms have to roll sometimes :)

IMG_7460

I'll keep you updated on how this project is coming together.  I'm thinking about just sending it to a longarmer for finishing because I don't really think I'm going to be able to do it myself in time.  Quilting a queen with a domestic sewing machine is tricky under the best of circumstances, but it might be a mistake to take it on when the movers are coming for my machine on the 16th, and I might not see it again until December.

Tuesday, September 16, 2014

Working towards Christmas

I don't know about everyone else out there, but September is when I start to feel the Christmas crunch.  This year, I planned a bit better and have a lot done, but I still have several gifts "in-the-works", and since we are moving at the end of October, and we don't know when our stuff will arrive at the new house (likely after Christmas), I'm trying to get several projects finished up and shipped out early.

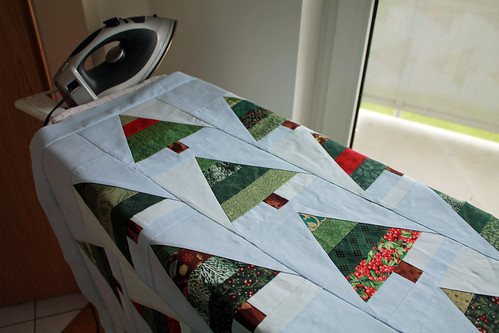
This week, I'm focusing on a project that I've been designing for a long time.  I drew-up this Christmas tree quilt several months ago, and now I'm finally at the putting together stage!  This weekend, I added the borders to my modern style Christmas quilt.  Many of the modern quilts that I've seen lately don't have borders, but I really liked the idea of framing my Christmas trees with a simple and clean border design.

IMG_7354

I'm really loving how it's turning out.  The blocks are foundation pieced from a simple tree block that I designed and arranged in a vertical, off-set pattern.  I went the foundation route because I wanted to use all of the Christmas fabric scraps that I had laying around, and foundation piecing is great for scraps :)

IMG_7359

This week, I'm going to hopefully finish the quilting on my domestic and work on finishing-up the pattern instructions.

IMG_7362

I've written patterns and tutorials before, but this will be the first one that I'm going to offer for sale.  I'm not sure when I'll have the pattern ready for sale because I want to see if I can get a few people to read it and maybe test it first.  

I'd love to hear from anyone else who creates patterns for sale and wants to share some wisdom about their experiences :)  

Monday, August 25, 2014

Playing with clay

In this post, I'm linking up with both Celtic Thistle Stitches and Missy Mac Creations for the HO HO HO and on we sew linky party and the new to me in August linky party because this month's Christmas gifts were done in a medium that I really don't have that much experience in; clay.

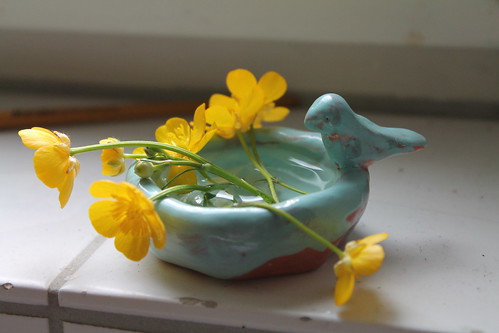
After I bought a ginormous block of white clay (apparently they don't just sell little blocks), I had more than enough for everyone to make something.  I couldn't let the kids have all the fun alone so I went ahead and made a little bird bath ring holder with some left-over clay for above my kitchen sink.  Right now, it's holding some buttercups that my son picked for me, but I just want to share the results of my dabbling with ceramics with everyone here. 

IMG_0076

Nope, clay is not something that I work in a lot.  Turns out that the whole process is a lot more involved than I originally intended since I had to drive over an hour away to drop off and pick up the masterpieces for two different firings, but I had a few projects in mind that I really wanted to do with kiln fired clay (not oven baked) and so we bit the bullet and focused on two main projects.


The first project was making a hand impressions for each of my children.  My mother has ones that we did as kids, and I wanted to do some too while the kids are still little.  I tried to do this a while back but someone else's project exploded in the kiln and ruined my stuff :(

IMG_7442

Hence, this time I rented out the whole kiln for just my stuff so that all these Christmas gifts that the kids made didn't get ruined again (plus, we made a lot of items since I had to use up a 25lb brick of clay).  I love all their little creations, and they are all excited about giving something hand-made to the grandparents.

IMG_7424

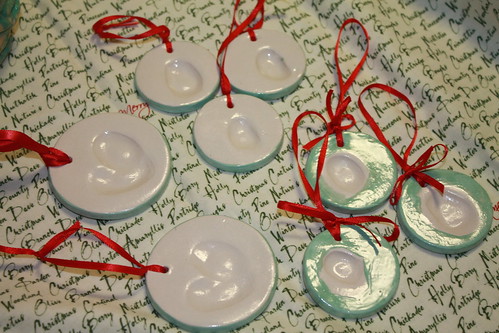
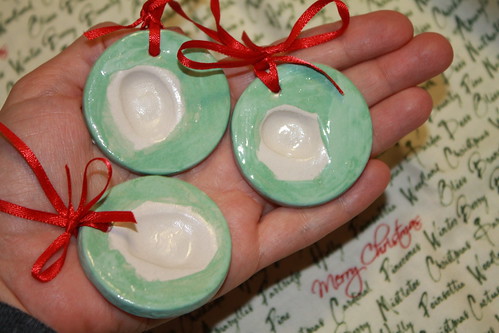
The main Christmas project that I got done were these fingerprint Christmas tree ornaments that my oldest helped me to paint and glaze before firing.  There's an ornament for each grandchild and one with where my husband and I made a heart shape with our thumb prints.

IMG_7435

I love sweet sentimental gifts like this and I think that the grandparents are really going to enjoy them.  I'm glad that we took the time to do these with kiln fired clay because the quality is just great, but it is a much more involved process than doing this same thing with oven baked clay.  I don't know if I'll be doing this again anytime soon, but we all enjoyed trying something new, and I think that everyone's gifts turned out great.  

Sunday, August 17, 2014

2 twisted wine cork wreaths

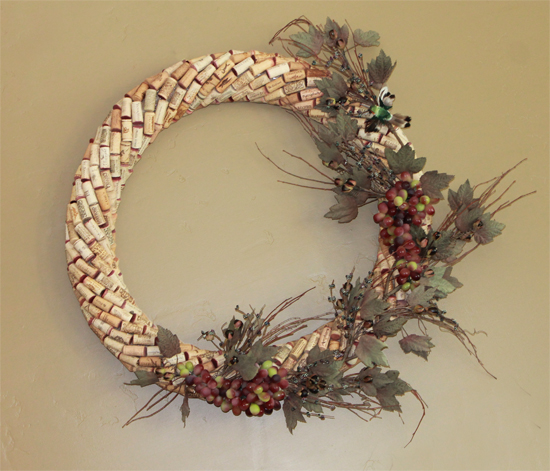
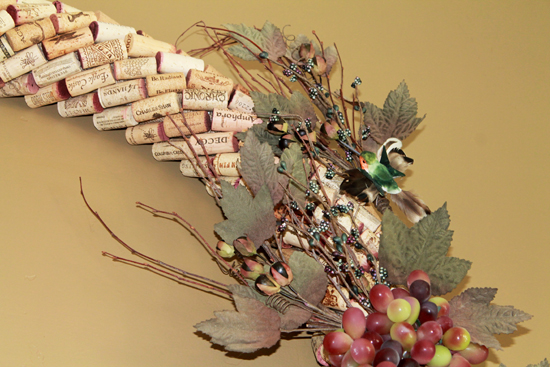
While I was in California last year visiting with my family, I got the chance to make my parents a really BIG wine cork wreath to hang over their living room fire place.  The space demanded a big wreath, so I made one using a pool noodle and larger child sized hula hoop as the wreath form.  I wanted a lot of movement in this wreath so instead of just stacking the corks symmetrically around the form, I twisted them around it.  I'm revisiting this project now because I just finished making a smaller version for my apartment door.  I love how both wreaths turned out and I have a few little tips to share with everyone that I learned along the way.

IMG_5107

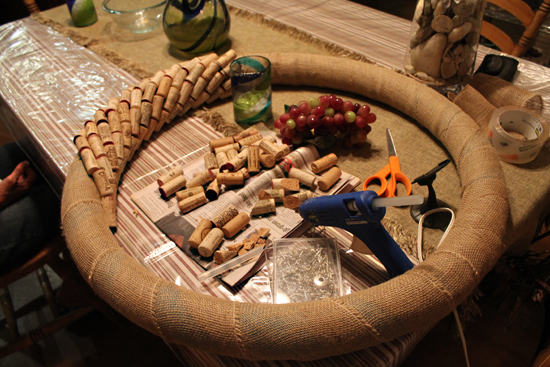
Tip 1: Burlap

As you can see, I covered the form with wide burlap ribbon so that the corks would have something to grip onto when I hot glued them down.  The burlap is also the perfect color base for the wreath so your gaps don't show the pool noodle color (no one wants blue pool noodle poking out form under their cork).

IMG_4924

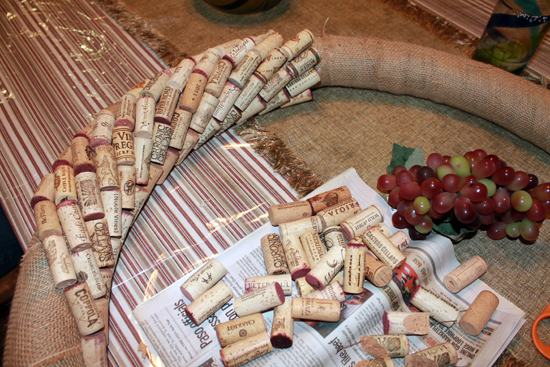
Tip 2: Sort your corks

The part that I found the most fun was choosing the individual corks to go on the wreath.  There are so many really cool ones out there to choose from; plus, I put a few special ones on the wreath too.  

IMG_5088

But, before you start gluing, sort out the small, long, and special corks.  As I put the corks around the wreath, I found that sometimes I needed a smaller or bigger one to make my row fit right.  I even had to cut a few corks down a bit to finish my row, but I always hid those ones at the back.

IMG_4927

Tip 3: Placement

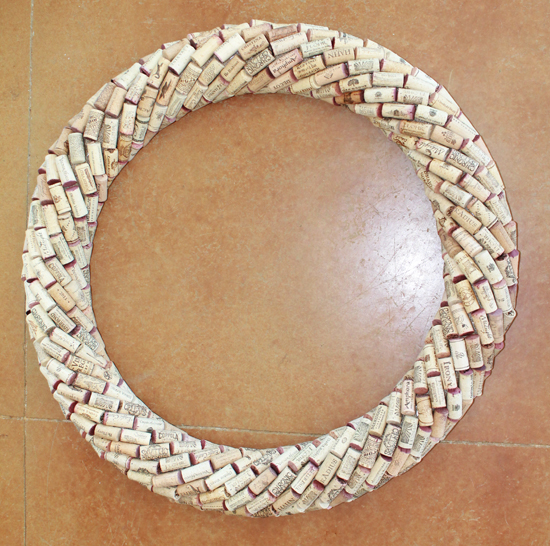
I did a lot of looking around the internet at different cork wreaths before I designed this one and I didn't see any that twisted the corks around like I did here, maybe it's because getting the placement right is hard.  If you're using a pool noodle like I did then I found that 6 corks per row was just perfect.  Once you get your first few rows in place it's important to make sure that you re-adjust  your corks as you go so the angle stays the same all the way around.  Because corks are not all uniform in size, it's easy to loose the angle.

IMG_5082

Tip 5:  Add a hanger before you glue the last few rows.

It took exactly 365 corks to cover this wreath, two bags of full sized glue sticks (not minis), and three days that involved wine and margaritas.  I blame the spot that got a bit wobbly on the margaritas :)  Just a note. This wreath turns out pretty heavy so make sure to use a sturdy length of wire to make a hanger before you add the last few rows of cork.  There is no good way to wrap a wire around the corks after you finish.


IMG_5110

Tip 6: Support the weight at the top and bottom

Even though I loved this wreath plain, I wanted to add a few wine country touches with grapes, leaves, and even a humming bird.  I love the little hummer because my parents always have a zillion hanging around their feeders.  When we hung this wreath, we used a 25lb picture frame hanger at the top, but also supported the weight of the wreath with a nail at the bottom to keep the wreath from sagging.  The bottom just sits on a large nail secured into the stud.  

IMG_7332

Tip 7: Choose a very even form

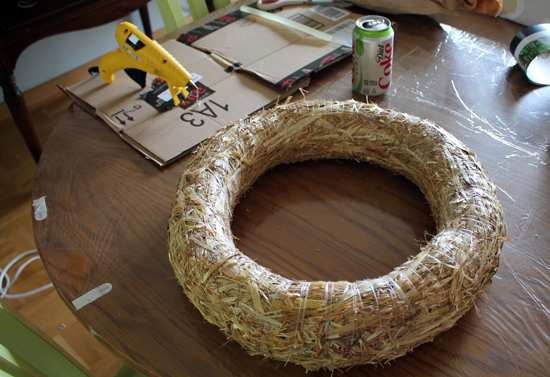
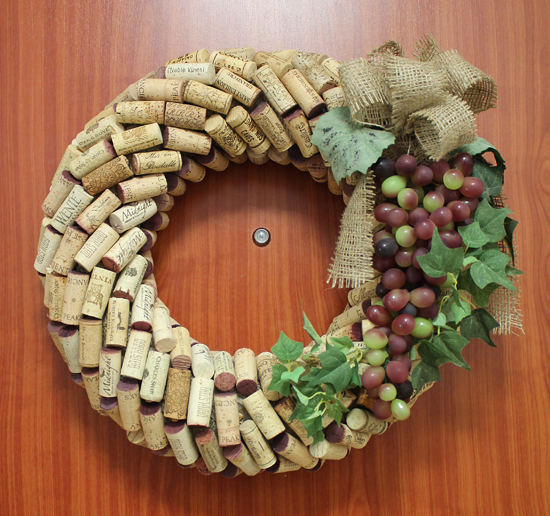
When I made the smaller version of this wreath for my front door, I only supported it from the top, but I used a lot of the same construction tips from the big wreath.  I only wish that I hadn't used a straw form because it is not uniform enough all the way around to keep the corks from getting off track.  I should have made another pool noodle form or bough a foam form so that I didn't have to deal with the the wobbles in the straw.

IMG_7349

I love how the door version turned out too, and I'm happy to have a nice wreath to celebrate the end of summer for my door.  I hope that my tips can help you make your own wreath to decorate your home.

How everyone else is celebrating the last part of summer?  Any special trips, activities, or projects planned?  

Thursday, August 7, 2014

August Illustration

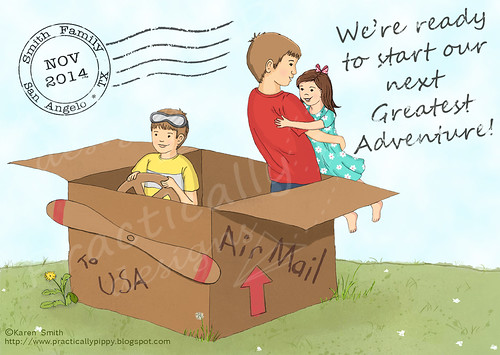
So, just doing a quick share today.  It's been a few months since I posted a monthly illustration, and this month's was inspired by our upcoming move back to the USA.  Yep, it's official.  We'll be moving back to Texas (where it all began for my family)  in November.  I'm going to miss Germany, but I'm also ready to be with our family back home.

moving box
We just told our families today and everyone is excited.  My brother-in-law is especially happy that everyone now knows because he's been keeping the secret for the last week while I finished the moving announcement.  I think it was totally worth the wait so we could share the news in a cute way, and my husband understands my particular brand of crazy enough to go along with me.  He's a good guy :)

I really, really can't believe that it's already August!  Summer has just flown by, and I can honestly say that this is one of the best summers that I've had in a really long time even with all the rain we've had over the last month.

We went to the Alps for vacation and hiked all over for a week. I could absolutely see myself living there it was just so beautiful.

14811855305_43723e3b16_z

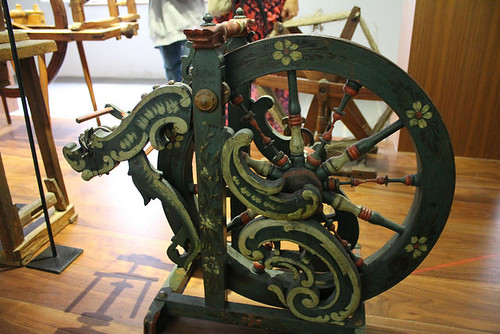
We also visited a few museums in Innsbruck, Germany and they had the most beautiful antique spinning wheels on display.

14569128650_0249e6fb7a_z

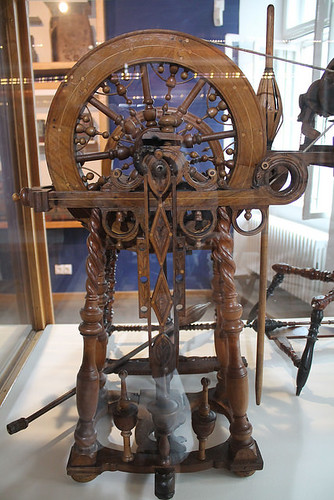
It's amazing the level of detail in so many antique pieces which is missing from today's utility items and tools.


14732897036_51ff6f6543_z

Okay, I think that I've tortured you enough with my holiday photos, but really look how much work went into carving this spinning wheel!  :)

What were you all doing this summer.  Projects? Trips?  I'd love to hear about all your adventures. :)

Thursday, July 17, 2014

There are Superheros Amongst Us

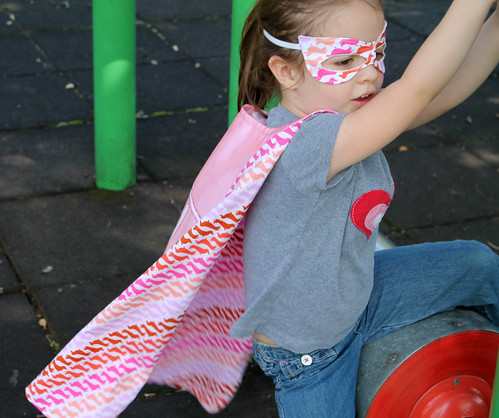
Because I have been super busy with school this summer (it's my Senior Year of College), my kids are doing a lot of solo play.  It's great to see them all at an age where they can just have fun together without Mommy having to come in and direct things all the time.  Lately, they've been really into playing super hero games with each other, but the blanket capes were constantly needing to be tied and retied.  This was making my little super heroes a tad cranky, and Mommy said "no" when they asked me to pin the blankets around their little necks (I suspected that that might end badly).  So, we dug through my stash and made a trip to the fabric store in order to find the perfect super hero cape fabrics!

IMG_5348 copy

Each cape and mask is double sided with an appliqued initial on one side.  I used a modified version of Sherri's cape tutorial, from her thread riding hood blog, for the capes.  I modified the shape and length a bit according to my kids' sizes and I added some light weight stabilizer around the collars to make them a bit more stable.

IMG_5329

I used some satin fabric from my stash for my daughter's pink puppy cape and adding the stabilizer really made a big difference in how it was laying.  It's going to be a while before I'm convinced to use any kind of silky fabric again, that stuff is slippery!

IMG_5369

For the masks, I used Dabbles and Babble's superhero mask templates.  By adding a seam allowance I made them double sided by flipping them inside out.  I also used a bit of stabilizer between the layers to help the mask keep it's shape and I really suggest that you don't cut out the eyes until after you satin stitch around the eye holes.

IMG_5322

This was a great little summer project and my kids insist on wearing their capes everywhere.  I think that I'm going to have to make a few for the nieces and nephews for Christmas too.

Friday, April 18, 2014

2 Fat Quarter Stocking Tutorial

Welcome to the fourth month of the HO, HO, Ho and On We Sew link party - April!

I'm thrilled to guest host this month's the HO HO HO and on we sew linky party.  It has really helped me to to get motivate to start early on my Christmas and Hanukkah gifts this year, and I hope that you will join me by linking up your Christmas project too.

Celtic Thistle Stitches  

Every month on the 18th, Paula at Mud, Pies, and pins and Fiona at Celtic Thistle Stitches will be hosting a link party where we can showcase our work and get inspired by each other and the variety of guest hosts that they have lined up. There is also a wonderful giveaway for entering the linky party.

To Add your link click below!


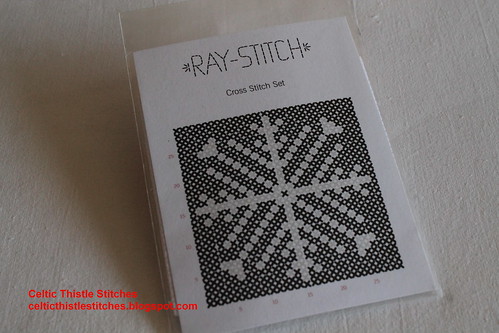
This month's prize was kindly donated to us by Raystitch, http://www.raystitch.co.uk/  It's great little mini Cross Stitch Kit that would be great framed, as a pin cushion or even threaded with a ribbon for a pretty ornament.

Raystitch HHHaoWS giveaway

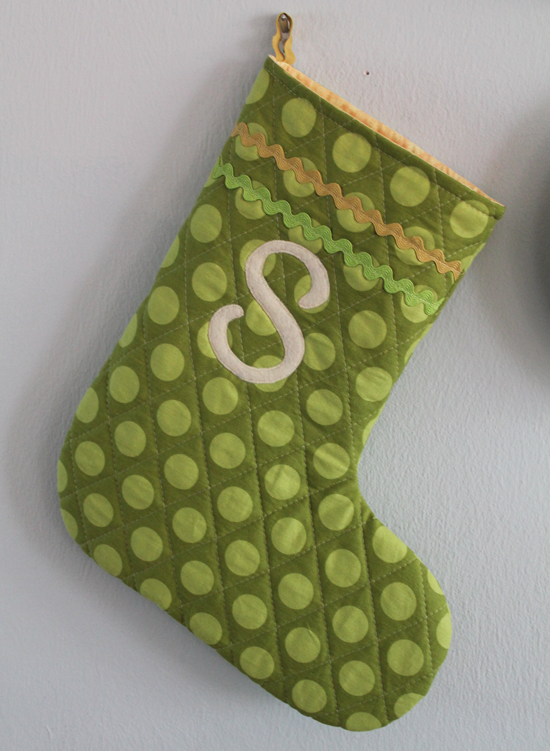
My Project this month is a Super Simple Stocking Tutorial.  This pattern is suitable for most beginners with some basic knowledge of sewing and you can download the stocking pattern here.  The best part is that it's fat quarter friendly; you only need 2!  

Make a Christmas Stocking using only 2 Fat Quarters Tutorial

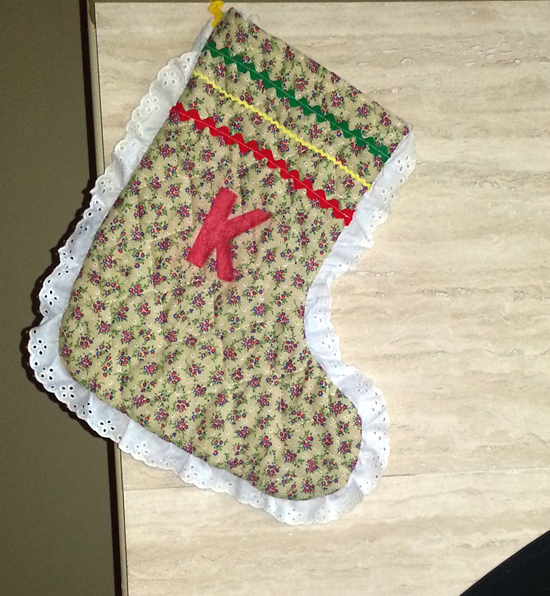
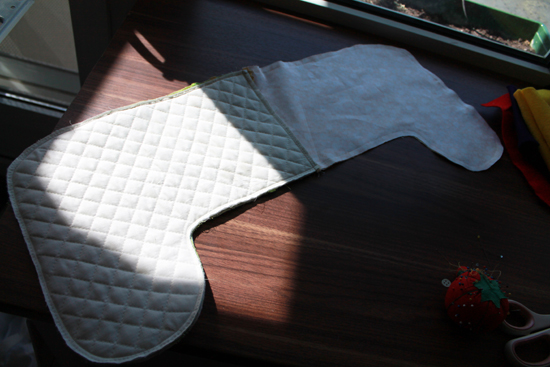
This stocking is based on the set of stockings that my mother made for our family back when I was a little girl.  Hers always seemed to be just the right size for most stocking stuffers (not too big that it never seemed full, and not too small where nothing would fit).  They were made from pre-quilted calico and rick rack and I've always adored them.  My mother was kind enough to fish this one out for me and trace it so that I could share this pattern with you today :)

The Stocking my Mother made

My version is the same size and shape as the original, but it includes a lining and is quilted by machine instead of using pre-quilted fabric (although you could use pre-quilted fabric if you want). It finishes to around 13h x 11w inches.

IMG_9632

The pattern comes in four pieces that you will have to tape together.  Make sure to turn the "scale to print" feature OFF!  

Supplies You Will Need
2 Fat Quarters (one for the body and one for the lining)
A piece of batting as big as a FQ
A piece of scrap fabric to back your stocking body for quilting (this doesn't show so it can be any cheap fabric that you have on hand)
A scrap of Felt or Fabric for the Initial
Medium Rick Rack for the loop and to trim

IMG_9635

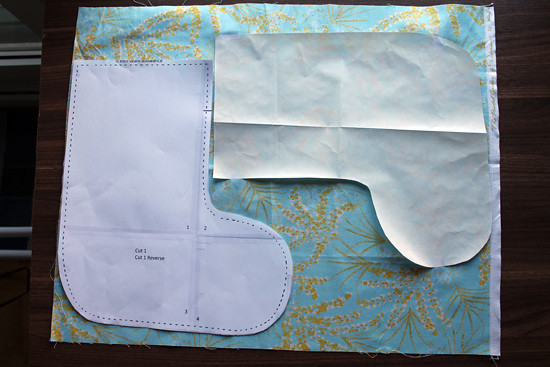
1. Lay your pattern pieces out on your FQs and cut 1 normal and one reverse for both the body fabric and the lining.

IMG_9639

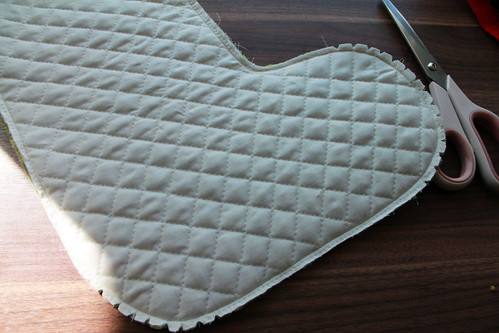
2. To add quilting to your stocking you will need to take the body pieces and make a quilt sandwich.  I used a piece of cheap muslin for the backing (since the lining will cover this) and a scrap piece of batting for the middle.  Lay your body pieces on the top and pin through all three layers.
IMG_9651

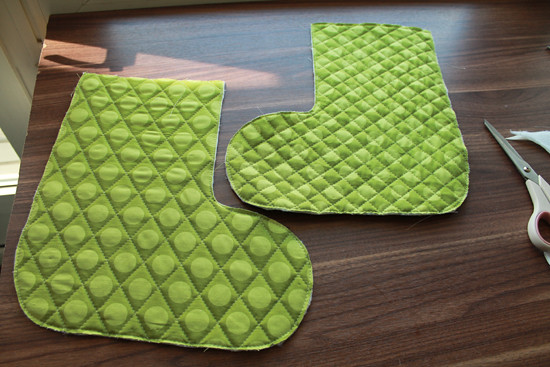
3. Quilt your body pieces using any technique and pattern you desire.  I quilted a simple diamond pattern to accentuate the dot design.Cut you quilted body pieces out.
IMG_9654

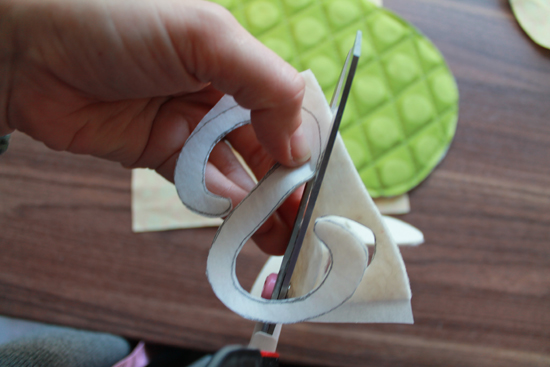
4. If you plan on adding any embellishments such as an initial or trim, now is the time to do it.  For an initial, print your letter out to size using your favorite font.  If you are going to use a fusible to adhere your letter, make sure to choose the "mirror print" option so that when you flip your letter right-side-up, it is not backwards.
IMG_9656

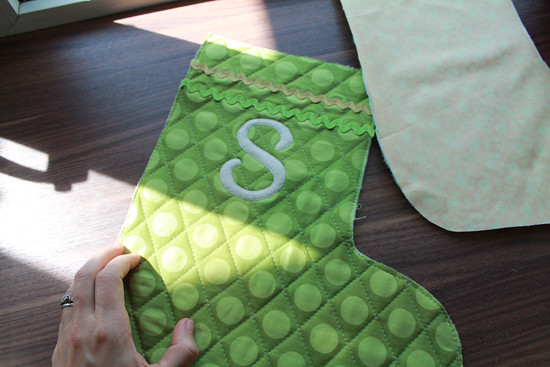
5. Sew down your letter using a zig-zag or straight stitch and sew a straight line through your rick-rack to secure it.

IMG_9657

6. Pin your rick-rack loop in place making sure that it is more than 1/4 inch in from the edge so that it doesn't get caught in the seam when you sew the edges.
IMG_9658

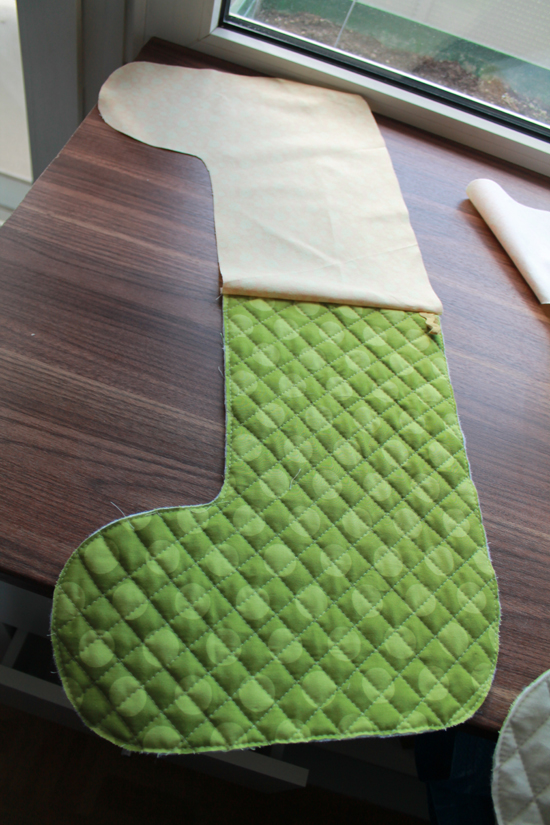
7. Okay, here's where it gets interesting :)  Lay your body fabric and lining fabric right-sides together and sew across the top edge using a 1/4 inch seam allowance.  Repeat for both sides.
IMG_9661

8. Open up your joined pieces and lay the right sides together matching the edges.  Sew the body side using your 1/4 inch seam allowance.  When sewing the lining side, increase your seam allowance to 1/2 inch so that it fits better when you turn it right-side out.  At the bottom of the lining, leave an opening big enough so you can easily invert your stocking.

IMG_9662

9. Trim the excess seam allowance from your lining fabric side and take a moment to notch your outside curves, and clip your inside curves on both the body and lining.  Don't skip this step.  Your seams are bulky and wont turn smoothly without a few notches and clips.

IMG_9665

10. Reach through the opening that you left in the lining and turn your stocking right side out.  Smooth your seems and your curves down from the inside until you are happy with the shape.

IMG_9664

11. Fold the seam allowance to the inside of your lining and sew shut.  Don't worry about making this invisible.  It wont show since it's at the bottom.
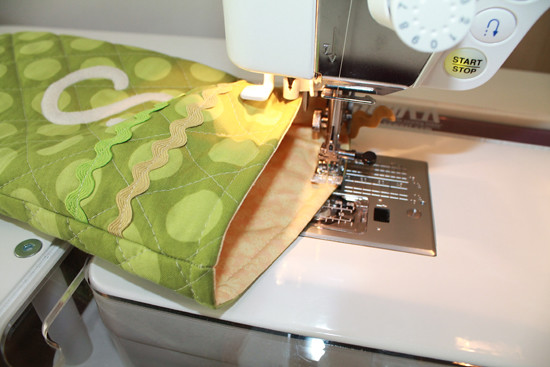
IMG_9666

12. Push the lining into your stocking body and maneuver it around until it sits smoothly inside. To give your top edge an added layer of security and finish, top stitch the body and lining together using a generous 1/4 seam.
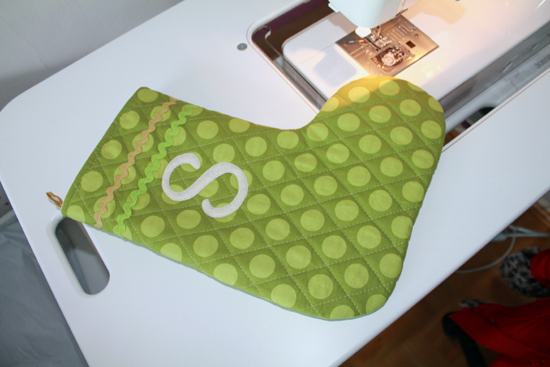

IMG_9667

Now your are all done and your stocking is ready to hang or to give as a gift!  I hope that you found this tutorial easy and fun.  If you have any questions please feel free to email me.

It's your turn to link up and show us the Christmas project or Christmas gift that you've been working on this month.  You have 'till the end of the month to join us and be entered into our lovely give-away!

Click on the link below to enter!


Also, I'd like to thank our sponsors.
My PhotoQuilting Fabric at the Fat Quarter Shop Ray Stitch HaberdasheryPosie: Rosy Little Things Backstitch   Plush Addict Logo