Showing posts with label tools. Show all posts

Monday, January 13, 2014

Quilting the Pink Chevron Quilt

I've finally got the quilting for the pink chevron quilt completed!  I'm excited to share some pictures of the quilting with you, and I also want to take this moment to talk about another great tool that I got over the holidays.

First, Let's talk tools

I finally invested in a real pair of quilting gloves over the holidays.  This is the first quilt that I've used them on and all I can say is WOW, why oh why did I wait so long!  In my defense, I really didn't think that they would make such a difference.  I'd used a pair of garden gloves before because I'd heard that they were basically the same thing at a much cheaper price.  Wrong!

IMG_8033

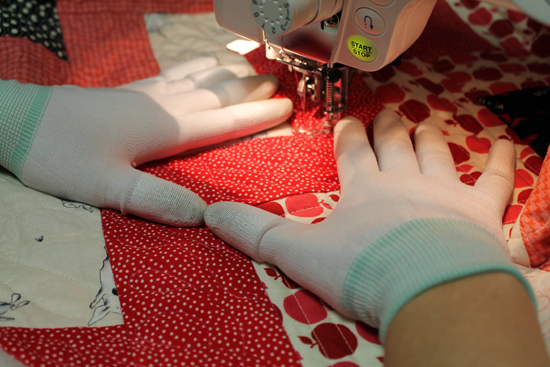
While there are many quilting gloves on the market, I bought a pair of Machingers in the small/medium size.  They are reasonably priced at about $11 USD, and they are worth every penny.  They didn't make my hands hot, thread didn't stick to them, and those rubber tips grip the quilt better than anything that I've used before.  I'm really impressed.  

IMG_8062

Honestly, learn from my mistakes and don't spend your money on cheap garden gloves that just don't help you move the quilt around under your domestic machine.  It's better to save up and invest in the right tools from the start. 

Okay, now onto the quilting 

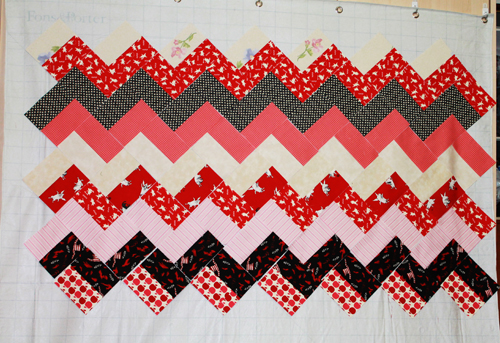
Last week, I talked about doing either an allover pattern or quiting within the chevrons.  Because no thread that I looked at went well with all the colors, I decided to quilt each chevron individually.  This let me shift between a variegated pink, a cream, and a black thread depending on the color of the chevron.
  
IMG_8063

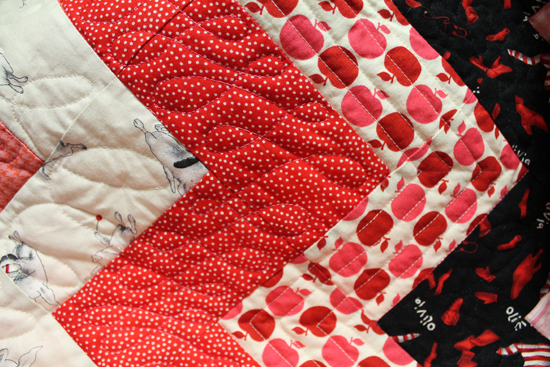
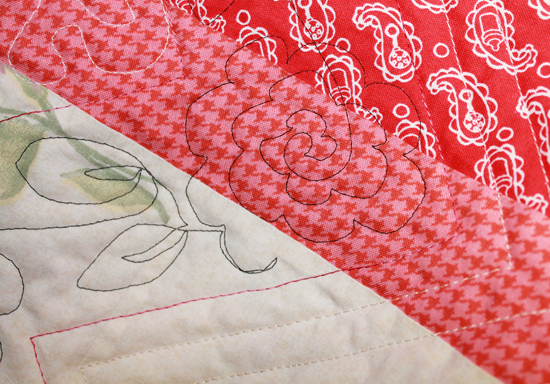
This also let me play around with the quilting a lot more too.  After I stitched each chevron row in the ditch, I got to practice lines, figure 8's, swirls, loops, and flowers.

IMG_8027

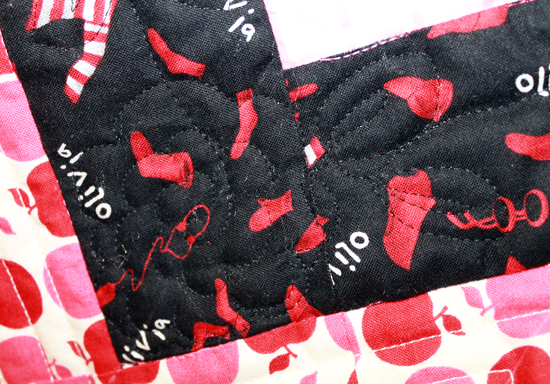
I used black thread on the black chevrons because I thought the other colors were too contrasty.  The quilting on the black chevrons does't really show on the front, but I made sure to do something pretty on those rows because the black REALLY shows on the back.

IMG_8028

I thought that black flowers on the back would look better then random black squiggles.  

   IMG_8066

I also quilted some inspiring words into one of the chevrons.  They are really subtle, but I think that they add a sweet touch to the quilt.  Just in case you are wondering, the words I wrote are kind, honest, brave, sweet, silly, and lovely.

Now onto the binding and the label!!!

Wednesday, January 1, 2014

New Year, New Project, New Tools

Happy New Year!

2013 is a year that I will never forget.  It has been an emotional roller coaster ride full of ups, downs, and upside-downs.  My family has been through a lot this year, and while the people in my life are my greatest joy, I'm so grateful for the happiness that my various artistic and crafty pursuits bring into my life and the lives of my friends and family.  There is just something very therapeutic about working on a project that will eventually bring a little more sunshine into someone's life.

NEW YEAR    
At Christmas, I got a few really nice, new tools.  Over the next few weeks I plan on sharing my opinions on some of these tools so that I can help my fellow crafters out there, who are thinking about how to best use those holiday gift cards ;)

My first review is of the Fons and Porter flannel design wall.  I got the 60"x72" size.  I've been looking at design walls for a long time, and finally decided on this one because is was reasonably priced and easy to hang up and take down.  I like the quality of the panel.  It's thin, but not flimsy, and the edges are all finished. I also like the grommets for hanging on the top, but I wish that it had them on the bottom too. The most important part is that my blocks really do stick and stay when placed on the flannel.

IMG_7868

The packaging recommends that you find a nice flat wall to hang the design wall on, free from knobs, hooks, moldings, doors, etc.  Because I live in a fairly small apartment, I don't have a wall that meets these criteria.  My solution was to hang the wall from my shrunk using 3M hooks and then securing the design wall to the floor (also using 3M hooks) at an angle.  I figure that this way, the blocks have a better chance of not falling off, and I avoid the cabinet pulls on my shrunk.

IMG_7866
I think it's working well, but after the project I have on there now is put together, I'm going to rehang the hooks using a level and try to tighten the design wall up more so it hangs taught.

All and All, I'm really happy with this design wall.  The grid lines and bias lines are a great help, and I'm sure glad to be able to put my blocks on a wall rather than trying to lay everything out on the floor!


I'm sure that you noticed the quilt that's on my new design wall :) Because it's the New Year, I'm glad that my first project is for my sister's new baby girl who is due in February.  I started this project with 4 quarter yard cuts of red, black, and cream Olivia the pig fabric that my Mother got me last year.  I then raided my stash to find enough pink, cream, and black to fill out the rest of the quilt.  I had to dig deep, but I'm happy with the fabric combinations.  I'm also liking the chevrons because my sister likes modern design and the pattern is pretty easy to assemble.

IMG_7864

I'll keep you updated on my progress over this next month.  I'm hoping to get this done ASAP so that it arrives before the baby :)  Wish me luck!

Related Posts Plugin for WordPress, Blogger...