Sunday, November 20, 2016

Quilted Christmas Wreath Pillow

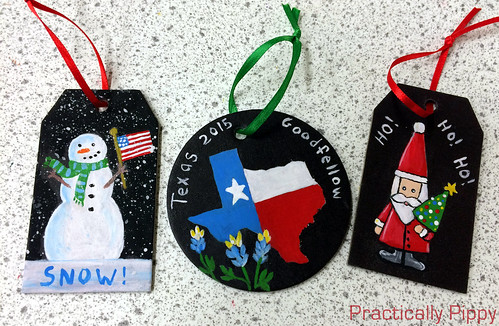
Welcome to the November HO, HO, Ho and On We Sew link party!

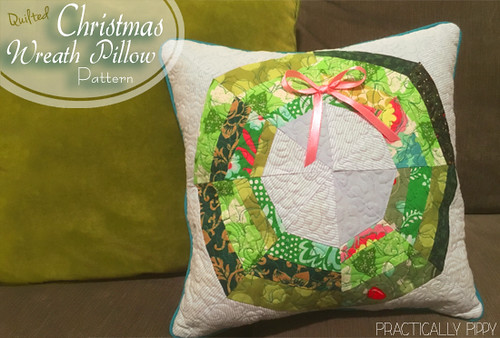
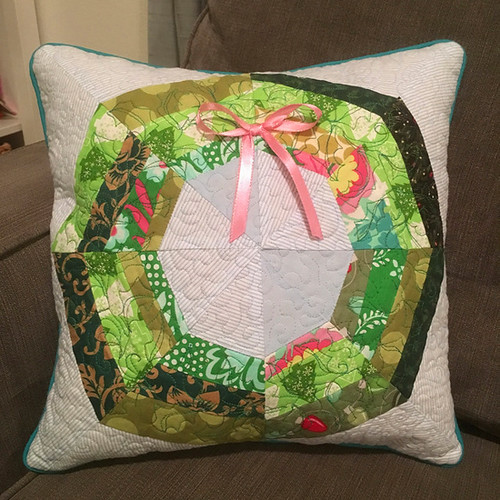
I can't believe how fast this year has gone by!  It's already November (crunch time), and if you've been following along all year, I know that all your Christmas gifts are made and out the door by now :-)  What? you still need to make just one more little gift for someone?  If you think that you can squeeze in just one more Christmas make, then how about a modern, fun Christmas wreath pillow to adorn your favorite chair, couch, or bed.

Modern Quilted Christmas Wreath Tutorial at http://www.practicallypippy.blogspot.com

Every month on the 18th, Fiona at Celtic Thistle Stitches will be hosting a link party where we can showcase our holiday makes and get inspired and motivated to work towards our Christmas project goals throughout the year. There is also a wonderful giveaway for entering the linky

Celtic Thistle Stitches

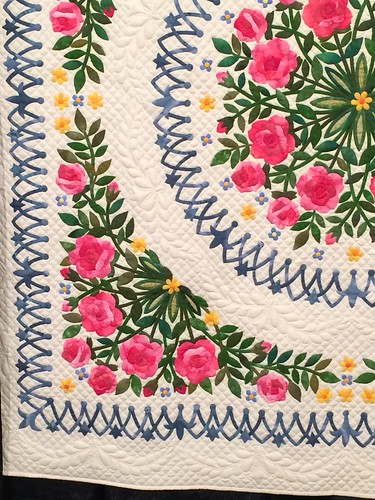
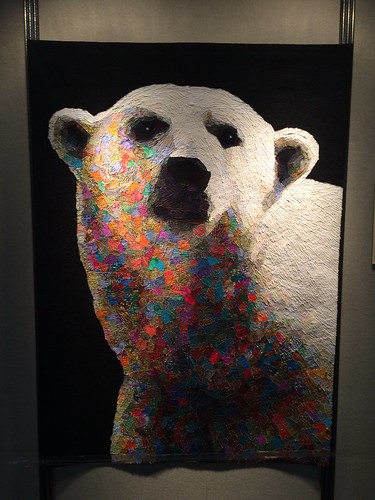
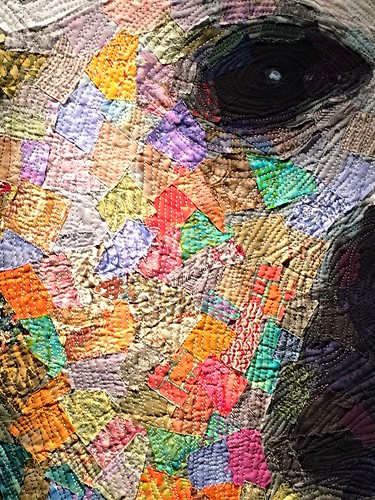
This month's prize of 5 FQ's from the Northern Lights collection was kindly provided by Justin of Simply Solids.  Go to Simply Solids to get a look at the lovely fabrics.  I'm personally in love with the Polar Bears!
SS_logo_RGB_high

For this months project, I want to share a fun, easy, and fast little wreath pillow that you can make as a quick gift or use to add a little more holiday cheer to your home.  The pillow measures 14 inches finished.  This is a foundation paper pieced pattern.  If you've never foundation pieced before, there are many great tutorials on YouTube that will teach you how.  Connecting Threads has a great one that you can find here.

Modern Quilted Christmas Wreath Tutorial at http://www.practicallypippy.blogspot.com

To make the pillow you will need:
Printed pattern sheets
Stuffing
Thread
Assorted Christmas fabric strips or scraps
Plain background fabric
batting
1 pkg 1/2" bias piping or around 2 1/2 yards of piping (optional)
5/8th inch ribbon for the bow (optional)


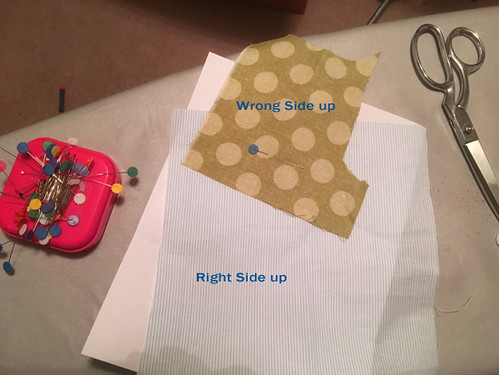
First, download the pattern here and print four of each piece A and piece B.  Make sure you print the pieces without scaling to ensure you get the proper size.  Next, collect a variety of fabric scraps from the various projects that you've been sewing all year :) and a plainer fabric to use as the background for the wreath shape.

0 wreath

Using the unprinted side of your foundation paper (foundation paper piecing tutorial here!!!), lay out your background fabric right side up and your first strip wrong side up.  Make sure to check that your pieces are big enough to cover all the way across the triangle.  The background fabric should fully cover section 1.

1 wreath

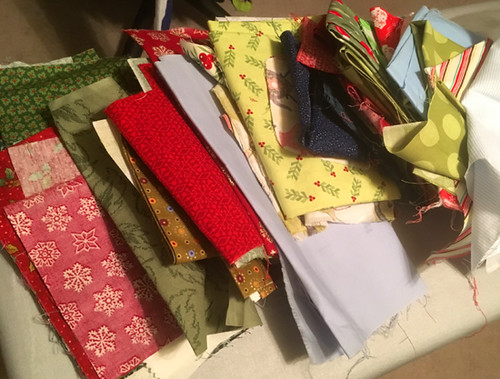
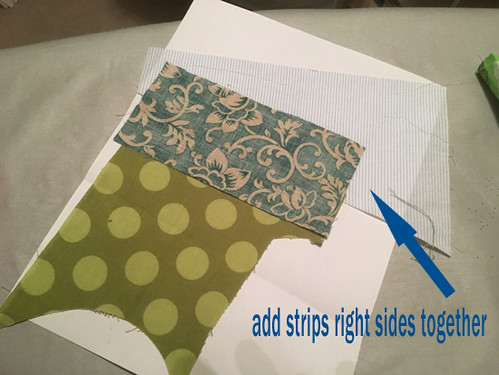
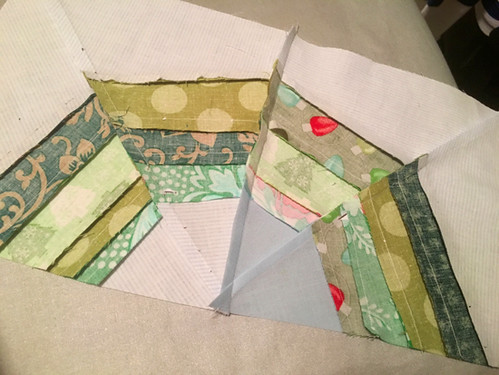
The strips that make up the center portion of your wreath are not mapped out for you.  This gives you the option to do one solid piece of fabric for your wreath section or randomly add strips like I did.  

Sew along the printed line to connect your first two fabrics together.  Trim, flip and press your block so that the right sides of both fabrics face up.  If this is confusing to you, go see the foundation tutorial!

2 wreath

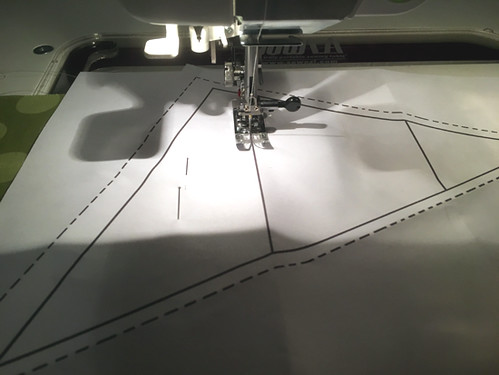
If you choose to do strips, the only thing you need to be careful to do is to sew a straight line across the whole wreath section and leave a 1/4 extra fabric for the seam allowance.  Keep adding Christmas fabric strips in various widths to your block until section 2 is completely filled.  Every strip will need to be trimmed, flipped, and ironed for the best result.  Use another piece of background fabric for section 3 to complete your block.

3 wreath

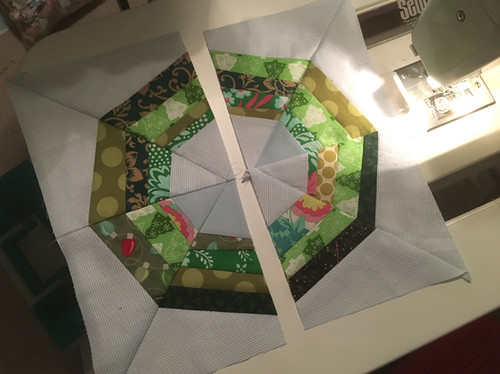
Complete 4 "A" pieces and 4 "B" pieces then trim them.

4 wreath

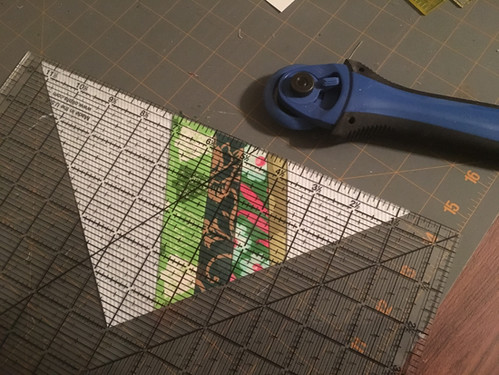
Lay out all your pieces and arrange them according to the pattern in a way that is pleasing to you, and then sew an "A" and "B" triangle together so that you have four square blocks.

5 wreath

Sew two squares together and press the seams all in the same direction.

6 wreath

Then sew your two pillow halves together.  

7 wreath

You might get a small bump in the center from where all the seams meet, but this can be corrected by fanning your seams, opening the center seam up, or just giving it a really, really good pressing.  Use whatever method is easiest for you.

8 wreath


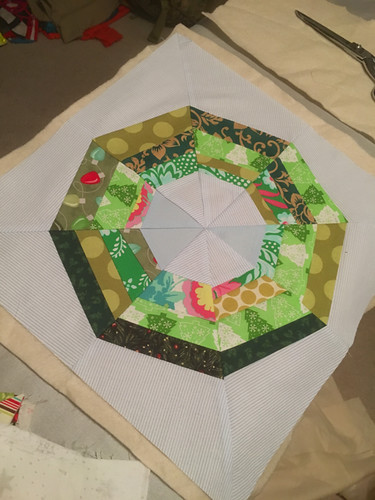
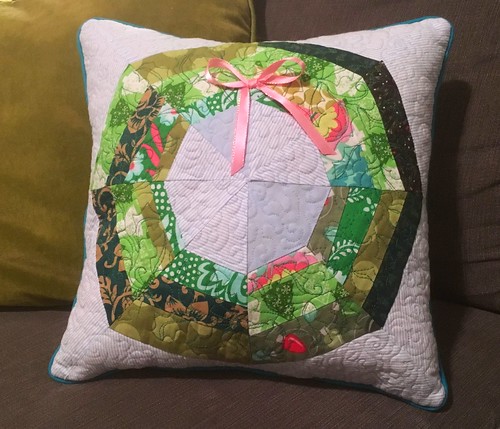
Layer your pillow top onto a piece of batting or felt (I used felt) and quilt as desired.  

9 wreath


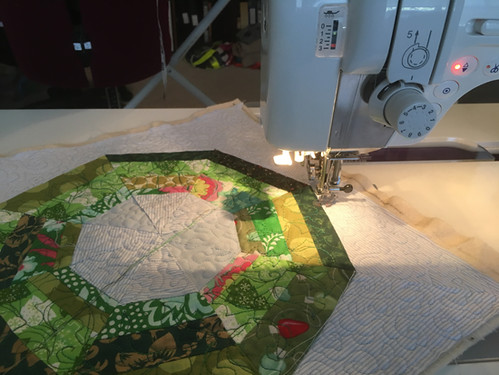
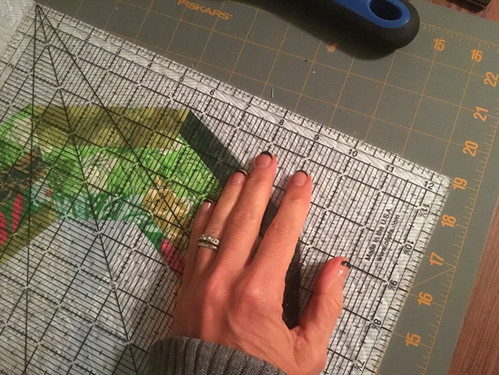
Square up and trim your pillow top.  Depending on how heavily you quilted your pillow top, the final dimensions might not measure exactly 15x15 so be aware of this when you are squaring up.

10 wreath


To make the back of your pillow.  Measure the final size of your trimmed top and cut a piece of fabric a 1/2 inch bigger on all sides.  So, if your top measured exactly 15 inches square, cut your backing piece 16 inches square.  Layer the back fabric on top of a piece of batting or felt and quilt as desired.  

Once quilted, the backing piece should be cut the same size as the front.  I did it this way so that your back piece wont end up too small for the front piece due to quilting shrinkage.

12 wreath


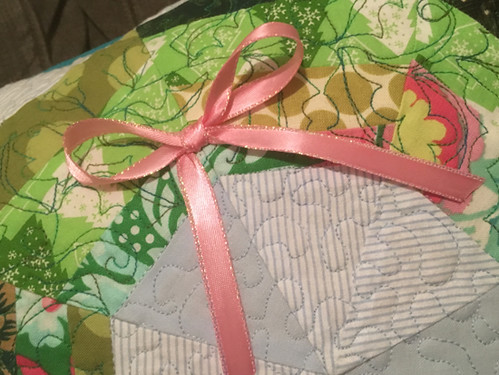
If you want to add any ribbons, buttons, or other embellishments to the front of your pillow, it's easiest to do it now.  I added a pink bow (red would have been more Christmasy, but I'm feeling the pink this year). Let your imagination run wild or just leave it clean and simple.

11 wreath


Stack your pillow front and back right sides together and sew a 1/2 inch seam at the perimeter leaving a hole that you can use to add the stuffing.  I inserted a piece of piping on my pillow, but your don't have to. Trim your corners and flip the pillow right-side-out.

13 wreath


Stuff your pillow and close up the hole by hand or machine.  I do it by hand for a cleaner look, but if you don't mind a line of stitching, you can use your sewing machine.  You could also make the cushion with a zipper closure or an envelope back if you wanted to be able to change out your look easily.

wreath

Your pillow is now ready to enjoy!  I hope you found my pattern fun, easy, and adorable!


I can't wait to see what you've all been up to this month so be sure to link up here!


I also want to give a huge thank you to all the sponsors who participated in this years HO HO HO and on we sew link party!!!  You all ROCK!


https://www.etsy.com/uk/shop/nicoledebruin
  
http://www.needcraft.co.uk/
http://www.elephantinmyhandbag.com/http://www.tikkilondon.com/http://www.japancrafts.co.uk/http://www.rylandpeters.com/
 
https://www.etsy.com/uk/shop/summersville
https://www.etsy.com/uk/shop/AngieAttwoodTextiles

http://simplysolids.co.uk/
http://sewsweetness.com/

 
http://www.tina-francis-tapestry.co.uk/

Monday, December 21, 2015

Chalkboard Christmas Ornament Gift Tags

So, hopefully you all have most of your Christmas making and buying done for this year and you're ready to wrap all your gifts and get them under the tree.  To that end, here's one little last minute make for you before Christmas.

tags

These gift tags are a nice little re-usable addition to your packages.  The painted side is pretty and decorative.

tag backside

And, the backside is perfect for labeling your gifts.  The best part is that you can use them year after year.  Just wipe off the chalk and you're ready to go.  They can also double as cute little Christmas Ornaments, too.

I made these up as a craft that I was teaching locally (I'm sure the Texas gift tag hinted at that), so these are really fast and easy to paint for beginners. Download the pattern and instructions here and enjoy :) 

In my instructions, I suggest that you make a stencil to underpaint your tags in white so that your colors show up on the black background.

Untitled

While I highly suggest that you underpaint, you don't have to use a stencil.  Use whatever method you like best for transferring the design, but if you plan to make several tags, it might be worth making a stencil.

Untitled

As always, feel free to personalize your design however you want.  Be creative and change the flag if you're not in the states.  Dress your snowman in an apron and hat.  I'm just giving you a jumping off point, but the sky's the limit :-)

I hope these little gift tags help you to add that special little touch to all your presents.  Have a Merry Christmas everyone!

Thursday, November 26, 2015

Happy Thanksgiving!

Happy Thanksgiving to all my Friends and Family!


To be very, very honest.  I really haven't done a lot of seasonal decorating since we moved back to America.  I still have boxes that need to be unpack and furniture arrangements that require more tweaking. So, holiday decorating is on the back burner. But, I recently made a chalk board/backpack station for my kids using an old, discarded dresser mirror frame. 

This is the first time I've actually tried to draw on it.

Chalkboard Backpack Station

I have to say, drawing with chalk is harder than it looks.  I drew this freehand without any real plan and getting good lines and shading was nearly impossible.  I don't know how those chalk artists do it.  Just goes to show that just because your competent in one medium does not make you a master in another :)

I think my chalk board's surface is a bit too rough for any really good chalk  art, and if I want to do this again, I might need to sand it smooth and put another coat of chalkboard paint on with a sponge roller.

Chalkboard Thanksgiving Turkey

For a first try, I'm happy with how this turned out.  I really only did it for my little girl who guilted me into drawing a turkey for her since I've been promising to decorate the chalk board for two months now :)

Again, Happy Thanksgiving everyone.  Have a great day with friends, family, and food!

Friday, November 20, 2015

Houston Quilt Festival 2015

I'm so happy that this year I got to attend the BIG Houston, Texas International Quilt Festival!


I always love going to this show, and now that we are back in Texas, it's much easier to attend since the travel time is minimal. By minimal, I mean it's a good 6 hour drive.  Not too bad, except this year it took us a little over 13 hours to get from my house to Houston due to all the flooding. 

Texas Flooding

Little did we know when we started out on Friday morning that we were about to get caught up in one of the season's worst storms so far.  We saw cars floating in the water, torrential rain, roads closed, and major traffic diverted to two lane highways not meant for that many cars.  We ended up arriving after midnight, completely missing the show on Friday, but we arrived safely.

Untitled

This year's festival did not disappoint.  The quilt show featured so many different exhibits that it was hard to see everything.  And, there were so many vendors that I only had time to focus on a few dozen that really interested me and scanned the rest.

Houston IQA show flower quilt

While I do love the vendors at these shows, I can't get enough of the magnificent quilts exhibited by quilters from around the world in so many different styles here! I love the bold colors and dramatic angles on this floral quilt.

Untitled

The quilting is also very nice and is a good contrast to the sharp lines of the flowers.

what's for dinner

The "What's For Dinner" display was also one of my favorites.  They set a table with place-mats featuring so many creative and funny meals.  My favorite was the naughty dog. 

Untitled

That naught beast ate everything on the plate but the peas :) As a dog owner, I can personally attest that this is just about what happens when you don't have someone guarding the table at meal time.

Untitled

This is a beautifully done more traditional applique quilt that I thought was just perfection.

Untitled

I love the wonderful use of color variation in this quilt and all the hard work that went into the applique, borders, and quilting.

Halloween applique

There were also so many creative people at the show decked out in home made Halloween clothing since the show landed on the holiday.  This fabulous lady let me take a picture of her wonderfully appliqued shirt.  Didn't she do such a lovely job.

monster ballMy mother (who went to the show with me) and I also got into the Halloween spirit on Saturday night when we attended the quilt festival's "Monster Ball".  They had a live band, great food, a photo booth, and a lot of crazy ladies dressed up and dancing the night away!  Wish you could see my mom's full costume.  She is a mad scientist with a crazy pink tutu on, and I'm a sugar skull flapper. Yeah, we're weird, and we're cool with it :)

The last two quilts that I'll post were my favorites.  "Like Cinderella" is by Yukiko Maruhama from Japan.

Houston IQA show like Cinderella details

I just swoon over all the different shoes on this quilt made from so many great fabrics and buttons!  


Polar Bear Quilt
This was my absolute favorite quilt at the show.  I even made a special trip back to visit this quilt one last time before the show closed.  It's called "Now you see him" by Cat Larrea of Alaska.

Houston IQA show polar bear details
Not only did I fall in love with the wonderful subject and great composition of this quilt, I love the artist's use of tiny fabric scraps to piece this quilt together like a mosaic.

Untitled

I also love how she used brightly colored fabric as the shading instead of an overall dark shadowy color.  I lingered near this quilt for a good long time before saying goodbye :)  It was a great way to end a great show and wonderful weekend with my mother.

If you want to see more of the quilts from the show that I photographed, make sure to watch the slide show at the top.  Hope you enjoy it as much as we did. :)
Related Posts Plugin for WordPress, Blogger...