Saturday, December 29, 2012

Friday Finish

Winter Rails and Grandmother's Fabric

This week I'm linking up for the Friday finish because, ta da, I actually have a finish to link!  This lap sized quilt was made for my brother as a birthday/Christmas present.

DSCN3130


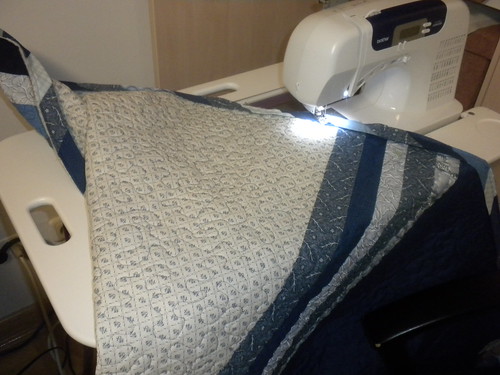
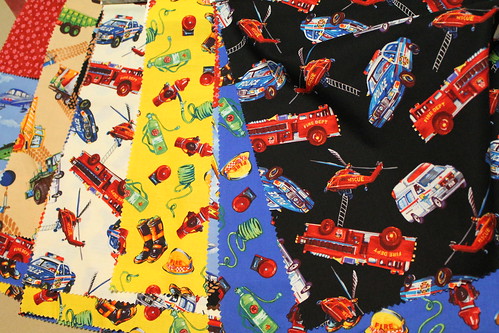
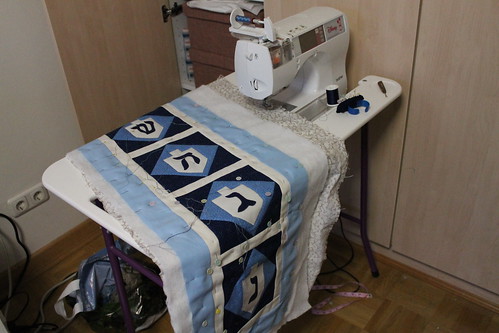
I started working on my brother's quilt about two weeks before Christmas.  I had a small pile of blue themed wintery fabric that I didn't like, then I has a pile of blue that I did like, then I also had a pile of blue/cream that I inherited from my Grandmother when she passed away several years ago.  I wanted to create something for my brother that featured these special fabrics from my Grandmother so that he could have a little part of her around his house.

My Grandmother didn't really quilt, although she did like cutting her fabric into squares when the mood took here.  But, she did have a small stash of fabrics around her house that we kids played with and cut up.  My grandmother always let me use her sewing machine, even when I had no idea what I was doing, and she even showed me how to sew my first pillow case.  I hope to make a quilt for my sister and also for me with the rest of my grandmother's fabrics later this year.

IMG_0519ab


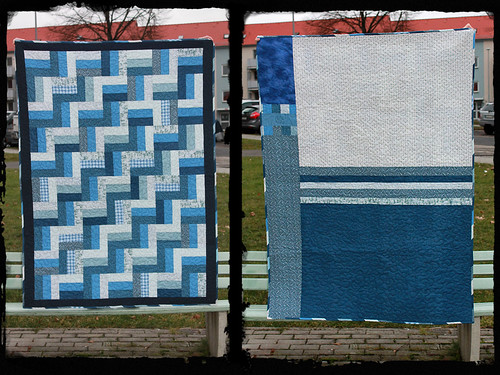
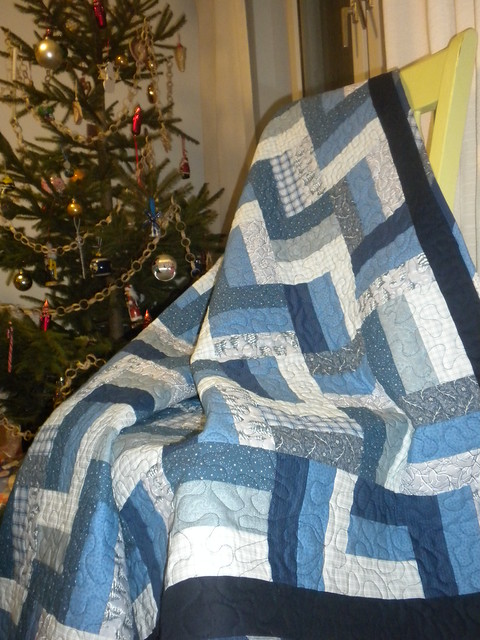
The front of my brother's quilt is a simple split rail fence design.  I wanted to keep it clean and graphic to suit his tastes.  Do you see my little oops.  I though about fixing it, but decided to leave it in.  It will throw my future great grand nieces or nephews off :) The back is pieced to really feature a huge piece of tiny blue tulips on cream fabric from my Grandmother.  I also used left over strips to tie the big pieces together.

DSCN3129a
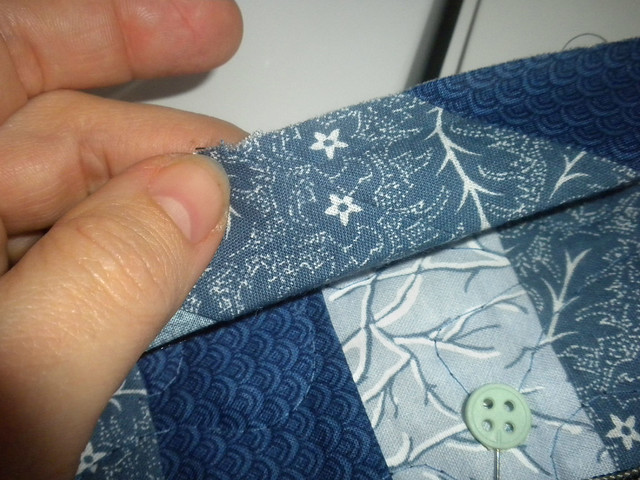
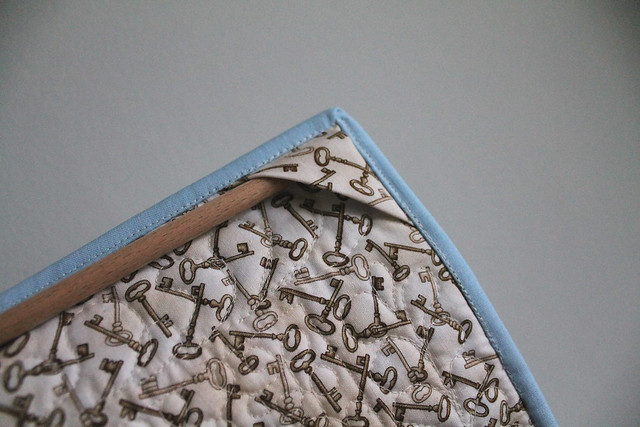
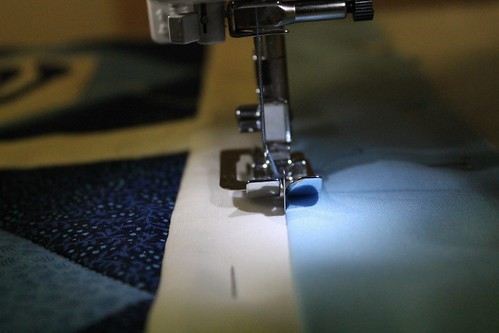
I also had a lot of leftover strips that I used to make scrappy bias binding.  Talk about good quilting karma; I ended on the exact same fabric so the join is almost invisible!  Of course, that's where my luck ended with this quilt.  I'm sad to say that my old Brother sewing machine died a smoking, screaming death during the making of this quilt.  It had a good life, and I will miss it.  I had to borrow my neighbors sewing machine to finish the binding, and now I'm looking to buy a new machine to replace my Brother.

It's funny how a pile of fabric that I wasn't in love with turned into a quilt that I really like and am happy to send to my brother.  See, quilts are magic :-)

DSCN3269

Can anyone spot the quilted hand? I put it right over the label :)

Tuesday, December 25, 2012

Christmas trees and Cars

Here's some more Christmas Market eye candy for everyone.  This if from our trip down to Austria where they make many traditional ornaments out of straw.

DSCN3153

On Saturday, I went with the boys to go get our Christmas tree.  We were planning a trip for Sunday and Monday, so we had to get the tree then or else we wouldn't have one for tomorrow.  We were having a fun time getting lunch, and then looking at the toy store before heading to the tree lot.  At the last second, I decided to hit the car wash to clean out the back of the SUV before we tried to stick a tree back there.  We stopped for less than 5 minutes, but when I tried to restart the car, nothing.  It wouldn't turn over or even jump.  My boys were devastated   They were so worried that we wouldn't be able to get a tree before we left for Austria.  Luckily, we were right next to our auto skills center, and they came to the rescue.  They moved my dead car to the garage and looked it over to see what was going on.  Right now, it looks like it might have just been some corroded cables, but it could also be the starter.  We'll have to wait and see.

DSCN3132I just want to say that the guys at our auto skills center made what was a major catastrophe in my boy's minds, into an exciting adventure.  They not only fixed my car, but gave my boys a lesson in car repair.  It's people like this who go the extra mile that really remind me that the world can be a beautiful place.


Then, it was off to the tree lot in the rain to find the perfect Christmas tree for under 20 Euro.  I think that we did rather well.  Happy Christmas everyone.  Have a wonderful time with friends and family!

DSCN3145

Monday, December 17, 2012

Christmas Marshmallow Wreath

I had this whole plan for a beautiful and elegant Christmas wreath with oranges and pine cones, but my little son was pinning with me (yep, my 5-year-old loves his Pinterest time with Mommy) and happened to see a marshmallow wreath.  It was all over after that.  So, I did a few experiments to find out the best way to get marshmallows to stick onto a wreath, and I'd like to share the directions that I came up with for anyone who wants to make their own marshmallow wreath without two days of trial and error.

DSCN3121

Before I get to the wreath, I just wanted to share a little Christmas fun with everyone out there.  My family just loves this time of year in Germany.  There are always great markets and fests to go to here, but Christmas is by far the best.  I love visiting all the different markets for the shopping and to see how each is decorated.  Each market has a different theme. Here where I live, it's the Twinkling Star Christmas market. We just went this weekend and my 2-year-old discovered the carousel.  It was a great time. 
  
DSCN3103


Marshmallow Wreath Directions:

Supplies:
Wreath Form (14" for mine)
low heat hot glue gun
2 Bags of regular Marshmallows (stale)
1/2 bag of mini Marshmallows (stale)
White crepe paper or ribbon
1.5 yards of accent ribbon in your choice of color


DSCN3119 copy


Directions:

1. Prep your marshmallows!  Take all your marshmallows and spread them out on a few cookies sheets or some kind of rack for at least 2 days (periodically flip them around so all sides get exposed to the air).  You want your marshmallows to get stale.  Yep, stale.  Fresh marshmallows don't stick well.  I know that you want to do your wreath today, but if you put fresh marshmallow on a wreath, they tend to not stick as well as the stale ones.  It can be done, but I can't guarantee that they wont keep falling off when you close and open your door. *depending on where you are it can take more or less time for marshmallows to get stale*

2. If your form is not white, wrap your wreath in white crepe paper or white ribbon so that the areas that show through aren't noticeable.

3. Using your hot glue (the low temp kind), you don't want your marshmallow to melt here.  If they get too melty, they won't stick.  If they melt a little, just hold them if place while they cool down.  Place your regular marshmallows all over your wreath leaving uneven gaps and spaces.    Don't pack them too tight or space them too far apart.  You want to fill in the spaces with the mini marshmallows to get a nice random look.  I used the whole two bags of normal marshmallows (minus a few that were sampled by the helpers) and about half the bag of minis. 

4. Make a bow with your ribbon leaving two long tails.  Glue bow to top of wreath. Use the rest of your ribbon to hang over the top of the door.  Secure the end with a hook or tape on the opposite side.

That's it.  A bit time consuming but really easy, and it smells great while your doing it :)


Saturday, December 8, 2012

Happy Hanukkah, Wall Hanging finish

Happy Hanukkah to all my Jewish Family and Friends.  I hope that you are all having a wonderful start to the Hanukkah celebration.  I just wanted to share my Dreidle Delight Wall hanging quilt finish.  Yes, I got it done and in the mail on time.  It's going to find a new home with my cousin and his wife.

IMG_9014a


This was my first ever attempt at doing feathers on my home machine.  I think they turned out okay.  I also did figure 8s in the cream border and a stipple stitch in the medium blue.  The binding gave me all sorts of problems.  I did a thinner binding than I usually do, and I did it all by machine.  I usually finish my binding by hand.  It just didn't want to co-operate with me at all, but I finally got it done.  Sorry about the mediocre picture, but I had to get it to the post office in a hurry!

IMG_9016a

The last little thing that I want to share with you is a tip on hanging a small wall hanging like this.  Because this is so small, there really is no reason to sew on a sleeve.  I just took two 4" squares, folded them in half diagonally and then sewed them into the binding.  This way, I can insert a dowel rod and hang it, or I can lay it flat on a table as a runner without the extra bulk of a hanging sleeve.  I also made sure to include the rod and the wall hook in the package going to my cousin.  I find that if you make people get their own hangers, the project wont get hung.

I would also like to note, that I only used fabric from my stash for this project!  Even the backing, which was a fabric that I've had for awhile now because I only need a 5" piece when I bought it.  I'm trying to use supplies mostly from my stash, the problem is that so many times I need just a bit more fabric than I have for something.  I'm sure you all know the feeling. :)

Wednesday, December 5, 2012

Sew Mama Sew Giveaway Day!

Giveaway Now Closed

* Thanks to the Random Number Generator, we have a winner!!!

Nancy Sue

 you are the winner of the Practically Pippy Sew Mama Sew giveaway! Congratulation.
Here is what Nancy is planning on making with her winnings:

"I have a 5 yr old son who would go ballistic with a quilt made with your fabric and a map on the back. I don't think he'd get a wink of sleep, as he'd probably end up switching the quilt back and forth, wanting to study the map!"  

Welcome all Sew Mama Sew visitors to my little corner of the blogging world.  I'm so excited to be participating in the Sew Mama Sew giveaway this week.  I hope to meet some new and wonderful people and fellow bloggers this week.


Okay, I'm a bit late but I still want to share some sewing supply goodness with you.  This week, I will be giving away not 1, not 2, but 7 sample packs of Blank fabric's Heavy Metal collection.

IMG_9020

Each pack comes with 7 pieces of boy themed fabric.  Construction trucks, police, fire rescue, airplanes, and helicopters.  By adding a blender or solid sashing to these fabrics, you could have a nice lap sized boys quilt by New Years!  To make your project even easier, I have a great world map panel (1.5 yards) in primaries that would be an  excellent backing for your project.

IMG_9023

When I got these supplies, I had hoped to make a boy themed donation quilt for a local hospital's quilt drive.  I only was able to finish two quilts in time and never got around to finishing this last one.  Now, one lucky winner will get to make something out of these great fabrics!

Everyone has two ways to enter:
  1. Tell me what you plan to make with this fabric and who you are making it for in the comments below.
  2. Become a follower of my blog, and then write a separate comment letting me know.  If you are already a follower, just write a comment to let me know that you're already following my blog.
I will ship to the United States and Internationally.  Giveaway ends at 9 am PST on the 7th of December and a winner will be drawn at random later that day.  The winner must email me back within 48 hours or a new winner will be picked.  If you are a no-reply blogger, you must include your email so that I can contact you.  If I can't contact you, I will just pick a new winner.  Good luck to everyone.   

Monday, December 3, 2012

Hanukkah wall hanging and stitching in the ditch

IMG_8979
It's snowing outside.  My kids are thrilled!  

IMG_8991
I've got so much going on this week, and in the weeks to come. School, kids, holiday parties, and all the sewing and  crochet that I need to get done before Christmas.  Yes, kids and my schooling need to come first, but I always try to find some time to craft during the day.  It's my "me" time; even if it's just 15 minutes.  This week I'm finishing up a Hanukkah wall hanging for my cousin.  I was hoping to have this out tomorrow morning, since Hanukkah starts on the 8th, but it's looking like it might be going out on Tuesday instead.

*          *                *              *
      *              *                      
*                *                 *
    *                          *
           *          *                 *    
*            *                *          
_n_  * _n_   _n_    _n_  * _n_    
(-_-)   (-_-)   (-_-)   (-_-)    (-_-)   
( . )    ( . )    ( . )    ( . )    ( . )    
( . )    ( . )    ( . )    ( . )    ( . )    


IMG_8995

I feel in love with this pattern from last year's December McCall's quilting magazine.  The pattern is called Dreidel Delights.  It's easy to work up and the instructions are pretty straight forward.  There was an error in the pattern instructions when they said to cut 9" strips instead of 7.5" strips, but thankfully I noticed it before I did any cutting.  

IMG_8994

I'm almost done with the quilting and I wanted to share a tip with some of you that I just learned!  I usually do all my stitching in the ditch with my walking foot and then go back and do my free motion quilting.  This time, I used my edge stitch foot to do the stitching in the ditch.  It is soooooo much better since the center guide rides the edge of the seam, I get perfectly even and virtually undetectable stitches.  It's awesome.  It's definitely going on my favorite things list.

IMG_8990

Cross your fingers and hope that I get this done by tomorrow!  Maybe then I'll have time to clean my sewing area.  Hey, don't judge! I thrive on creative clutter.
Related Posts Plugin for WordPress, Blogger...