
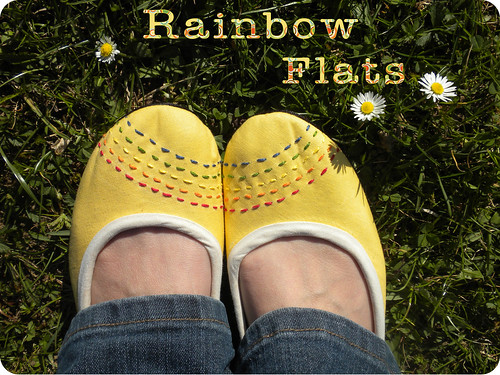
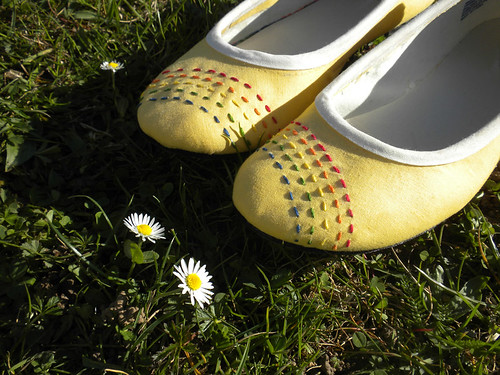
Yeah! Here they are, finally finished. My first pair of recovered up-cycled shoes. I call this pair of shoes my rainbow toe shoes. I really like how they turned out and am going to share some of the things I learned about recovering shoes with you here. This is not a full tutorial, but it might help some people avoid a few mistakes that I made and give you an idea of the supplies that you will need to recover your own shoes. Also, I'd just like to add that I did these from stuff that I already had in my stash!
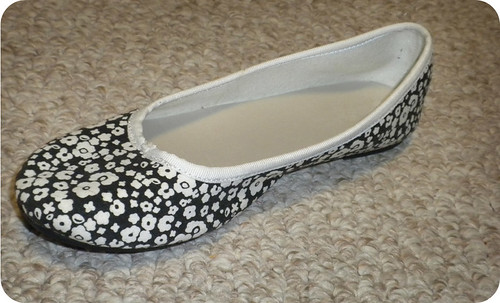
Here's the shoe that I started with. I'd just like to say than in the future I might stay away from black patterned shoes. The pattern tends to shoe through the fabric. I had to cover the shoe in white muslin first and then cover it in the yellow fabric so the pattern wouldn't show. This creates an extra step that is a bit of a pain.
Supplies to make these shoes:
- A pair of canvas shoes
- A bottle of waterproof washable glue like Aleene's OK to Wash or some Liquid stitch (The glue has got to be able to get wet! Using non-waterproof glue will make your shoes very susceptible to damage from everyday wear)
- A small foam brush or small old paintbrush
- Fabric for the shoes. I used a 1/2 yard of nice Kona cotton in Sunflower.
- A pencil and a chalk pencil
- Embroidery Floss in Red, Orange, Yellow, Green, and Blue (you could also use pearl cotton or thin ribbon)
- 1 pkg of Wrights 1/2 inch single fold bias tape in oyster
- 1.5 yards of black satin cording (the kind used to make a necklace)
- A sharp razor blade knife or exacto knife

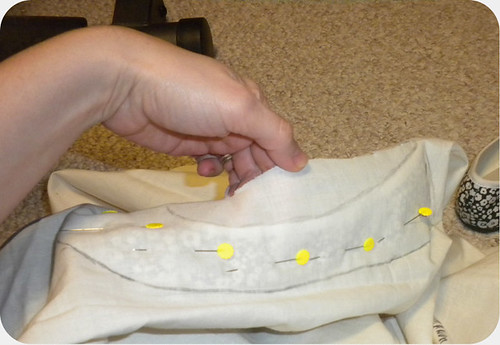
1. First, you need to make a template using either some fabric you don't want or some cheap muslin. Drape it over the top of your shoe, cut a slit at the foot opening, and pin it around starting at the toe. Go from the toe to the heel on one side and then the toe to the heel on the other. There will be some fabric bunched up at the heel. Take your pencil and trace along the top and bottom. Don't worry too much about being exact because you'll cut any excess off when you glue your fabric to the shoe. You should end up with something that looks a bit like an elongated horse shoe. Use this to cut your good fabric and make sure to add a seam allowance of about 1/2 inch. Flip your template over to cut the fabric for the opposite shoe.
2. Prepare your shoe. Your shoe should be clean. If your shoe has a binding around the top like mine, rip it off. You need to reduce bulk around the top or your shoe will be uncomfortable.
3. Brush your glue all over the outside of the shoe and lay your fabric gently over it smoothing it back from the toe to the heel. At the heel cut off any excess fabric so that the edges butt up against each other but do not overlap. Don't fold the fabric over into the inside of the shoe, this creates bulk that is not comfortable. Let this dry for a few hours or overnight.
4. With your SHARP razor knife, cut any excess fabric from around the bottom of the shoe. Try to get as close to the heel as possible and keep it neat. A dull blade will fray the fabric here and makes your job much harder. Cut the fabric even with the shoe opening.
5. Take your bias tape and glue it flat over the seam at the back of the heel. Cut the bottom even with the sole and the top at the edge of the opening. Don't fold the tape over the heel to the inside. Again, bulk at the heel is BAD.
6. Take your 1/2 in single fold bias tape and open up one side of the fold. Leave the other part folded over. Starting somewhere on the instep (not at the heel!!!) Glue the nice folded edge to the face of the shoe all the way around smoothing it taut as you go. Take the unfolded side and glue it to the inside of the shoe so that it lays as flats as possible. Make sure that you don't have wrinkles at the heel! This will give you blisters!
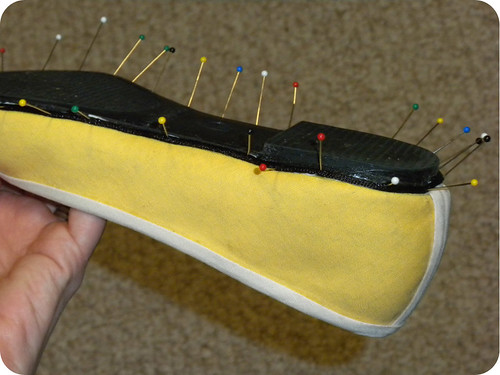
7. Take your black cording, or whatever color you want. I just wanted mine to match the sole for a nice clean look and glue it where the fabric meets the sole to cover the cut fabric edge. Pin it in place while it dries. I could have used black ribbon here, but I found that cording does a much better job of covering the raw fabric edge by sitting in that groove between the sole and the canvas.
8. Now the fun bit :) To embroider your shoe you do not need to know anything but the basic running stitch. With your chalk mark a basic rainbow shape on the two shoes. Then make a knot in one end and embroider your rainbow. If you can make a knot at the opposite end inside the shoe to secure the stitches, then go for it. I left the floss long and then glued the ends into the space between the shoe pad and the wall of the shoe.
There you have it. Brand new shoes from ones you may not have used otherwise. You could adapt this for any number of patterns. Have fun!
*TIP - let your shoes cure for a few days before using them and spray them with some scotch guard or other shoe protector to help keep them fresh looking longer.
wow! looking great :)
ReplyDeleteOh my goodness these are SOOOO adorable!! Clever and pretty :)
ReplyDeleteThese are AMAZING!!! I love the color now. I'm featuring this on Sunday!
ReplyDeleteI never would have even thought of making such a thing - really adorable.
ReplyDeleteVery pretty, just the thing for summer
ReplyDeleteVery cute idea!
ReplyDeleteLove the shoes so much. Love your blog...Ive awarded you the Liebster Award...
ReplyDeletehttp://sewlovins.blogspot.com/2012/03/oh-yeah.html
These are so stinking cute! I would prance around in those all day! Love the embroidery!
ReplyDelete